Introduction
Switching to a new marketing and sales platform is exciting.
It’s also daunting.
Viewing an unfamiliar UX and tinkering with new features is often overwhelming. People can easily become disinterested in software that they dreamed about using a short time before.
To avoid that scenario for ActiveCampaign newcomers, we created a guide to help you migrate as quickly and safely as possible. We believe if you adhere to the advice below, you will hit the ground running with ActiveCampaign and never look back.
But first, make sure our platform meets your needs.
When you’re starting a new job or moving to a new residence, you want to make the right choice and end up somewhere you can be for years. The same is true when you migrate to a new marketing and sales automation platform. Finding the right platform is more important than finding a new program as fast as you can. Rushing to a new service only to realize it doesn’t suit your needs is a colossal waste of time and money.
So, be sure to practice patience.
Recall your ultimate goals and determine what you need to achieve them. Are you merely interested in more advanced email marketing or do you want to fully automate your marketing and sales processes? Does ActiveCampaign truly serve your business needs?
If you’re still unsure, try to remember why you’re leaving your current platform. That should renew the excitement you had to try something new and to find a platform that lets you do more than ever before.
Many people move to ActiveCampaign to take advantage of our site tracking, flexible automation builder, and powerful CRM. Be aware of “Migrator’s Remorse,” but don’t let the fear of venturing into new territory stop you. If you’re leaning toward ActiveCampaign but have some unanswered questions, start a free trial or request a demo.
Ready to get active?
If you decide ActiveCampaign is the platform for you, then welcome aboard! We now offer a complimentary migration service to new customers with paid accounts. If you’d like us to transfer all your data for you, then that service is the way to go.
If you’re more of a self-starter, use this guide as your ultimate migration reference. Good luck, and happy migrating!
Sign Up With ActiveCampaign
After you clarify your intentions and decide to switch to ActiveCampaign, the first thing to do is create an account. We offer four plans: Lite, Plus, Professional, and Enterprise. You can compare features and pricing here, but keep in mind the Small Business plan includes a free one-on-one call with a member of our customer success team.
Here is what our customer success team covers in that initial call:
- Aligning ActiveCampaign capabilities with your business goals
- Basic account configuration (company name, address, website, etc.)
- Segmentation strategies using tags and custom fields
- Installing site tracking on your web assets
Using our site tracking feature is imperative. It records the actions contacts take on your web assets and enables you to send targeted communication. Your customer success rep would happily assist you with this feature, but if you want to do it on your own, simply go to your settings and click on “Tracking”. Copy the tracking code and paste it in the header on every web asset you own. Having this set up in advance allows precious, actionable data to pour in as soon as you flip the switch.
Once your site tracking is established and your account is created, the next thing you should create is your first list.
To do so, click on “Lists” in the top banner of your account. Then, click the green “+Add New List” button. Doing so brings up a “Create New List” window. There, you create your list’s name, sender address, and URL.
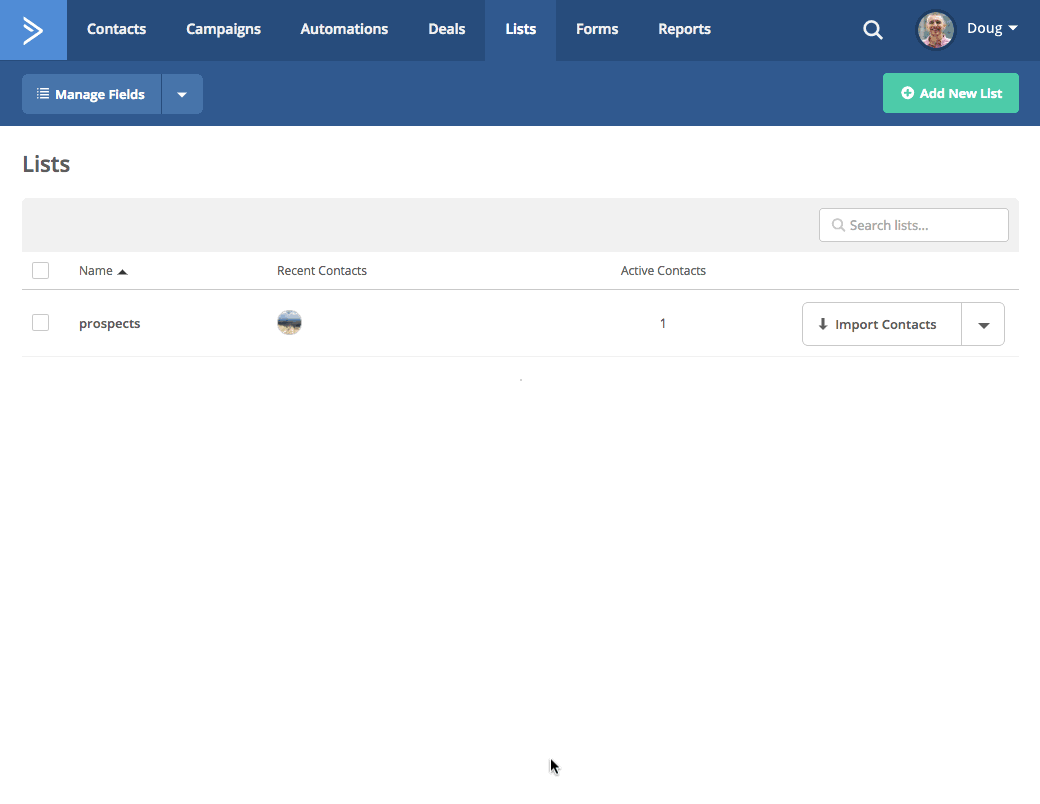
The first list you create should be akin to a “master” list (aka your prospects list). ActiveCampaign offers many means of segmenting contacts that we’ll explore shortly. Maintaining many lists can be problematic. So for now, just start with one.
By creating a list, you built a home for your contacts. Now it’s time to import them to your ActiveCampaign account.
Import Your Contacts
The safest way to import your contacts is to do so before you build automations or campaigns or assemble pipelines in your CRM. That way you can avoid accidentally sending them any messages.
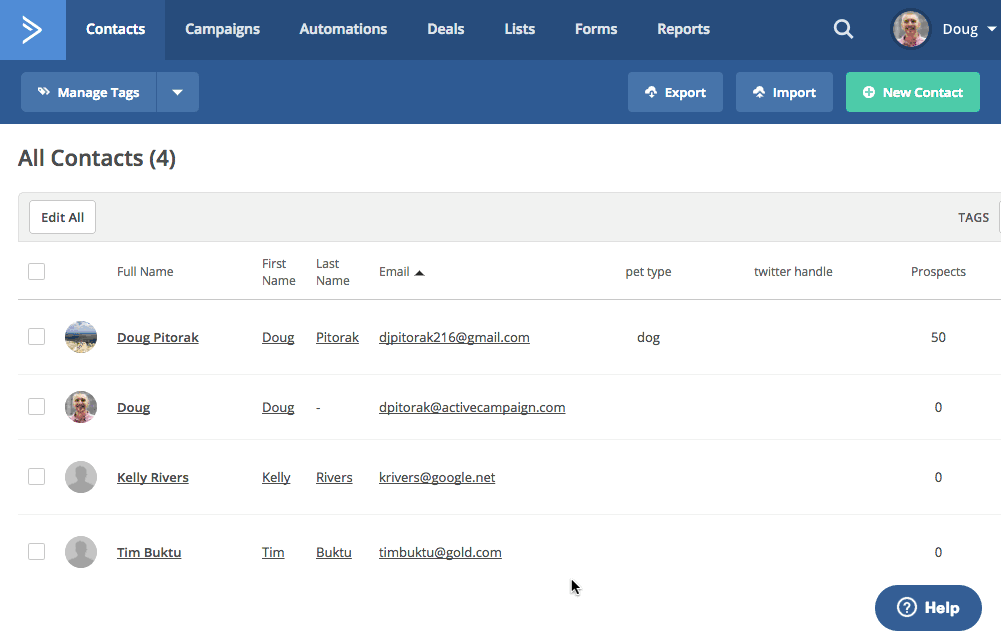
The import process is quick and simple in ActiveCampaign. To import contacts, click on the “Contacts” tab in the top banner of your account. Click the blue “Import” button. You’ll see two options: you can integrate services that are compatible with ActiveCampaign, or you can import a .csv file. The file should be akin to a “master” file, i.e. one that has all your contacts listed. We recommend having other .csv files for certain segments of your contacts (e.g. a file for each tag you created in your old system that contains the contacts who share the given tag). They will come in handy soon.
Select the file you want and click “open”. The next screen gives you options to segment the contacts you’re importing. For this initial import, we recommend selecting the master list and creating only the source tag. That is, create a tag that indicates where these contacts are coming from (e.g. “Source – MailChimp” or “Source – Infusionsoft”). Such a tag helps easily segment these contacts as you add more to your account over time.
The goal is to get all your existing contacts into your new account as quickly and safely as possible. We’ll discuss how to further segment your contacts with custom fields in the next step.
After you select the master list and create a source tag, click the green “Import Now” button. And just like that, your contacts are in your ActiveCampaign database and are housed in the list you created.
If you need more assistance, consult our help article for importing contacts.
Segment Your Contacts
Now that your contacts are in ActiveCampaign, it’s time to segment them. Segmentation enables you to send relevant messaging to your contacts. The extent to which you can segment contacts depends on the data you store about them.
For instance, you can segment contacts by location, gender, whether they’re customers or not, etc. In fact, ActiveCampaign prides itself on the variety of characteristics and behaviors you can segment customers by; any data your customer submits is fair game.
Tags and custom fields are how you represent such data.
Essentially, tags are the CliffNotes of contacts’ histories with you, a snapshot of their journeys. Tags provide a summary and allow marketing and sales people to craft more personalized engagements.
A commonly-used tag is one that indicates how contacts enter your pipelines (did they enter by clicking a link, downloading a white paper, or submitting a certain form?). Furthermore, you could create a “Customer” tag and apply it to contacts that have bought from you. Similarly, you could craft “Product” tags and assign them to contacts who bought specific products. You can effortlessly segment contacts by tags.
If tags serve as a synopsis of your contacts, then custom fields are the full story. While tags are used only internally, custom fields are leveraged internally and externally. By creating custom fields for contacts, you can personalize engagements to an unprecedented degree. You can store any information your contacts choose to submit to the custom fields.
For instance, you could create custom fields that ask for a contact’s birthday, gender, Twitter handle, etc. You can also create custom fields that automatically track contact behaviors, such as opening a certain email.
ActiveCampaign does not limit the number of custom fields you can create, and the platform offers a variety of field types to choose from, including text input fields, date fields, and drop-down fields.
When you create custom fields, you generate personalization tags (also known as merge fields), as well. Plug that personalization tag into your email, and voila! You’ve automatically personalized your communications with your contacts.
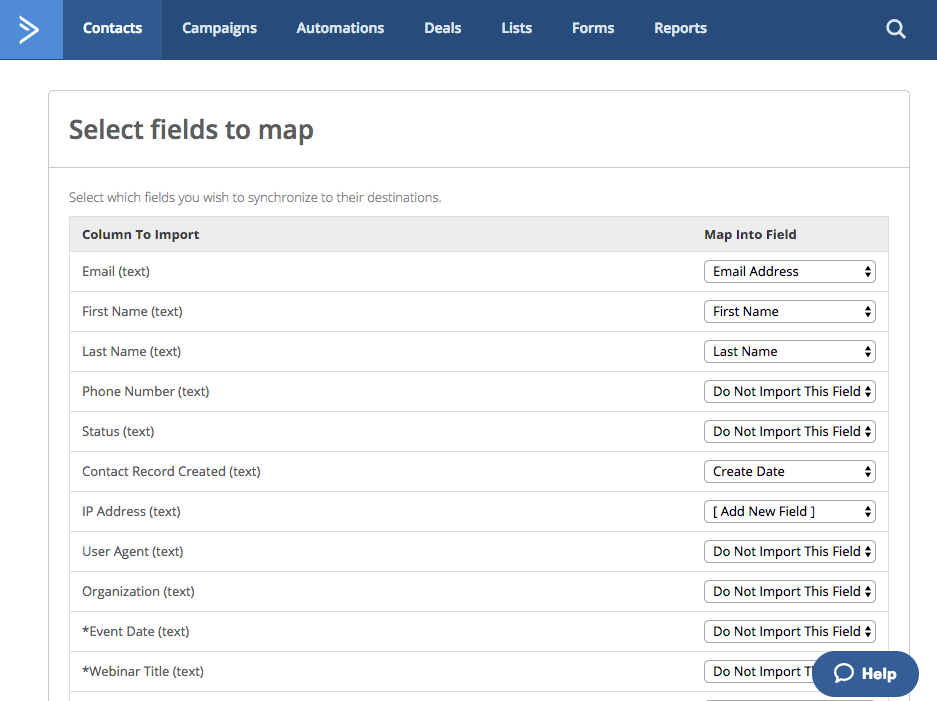
Did your old system already collect loads of contact data that makes good custom fields? No worries! You can preserve that data and map it to the custom fields you create.
The screen recording below shows how to map data into new custom fields in ActiveCampaign. Say you tracked which contacts opened a certain email. Import the .csv with that contact data into ActiveCampaign. The data columns appear on the left and you can seamlessly map them to the custom fields of your choice by selecting from the drop-down boxes on the right. You can also create new fields in those drop-down boxes, as we did in the example.
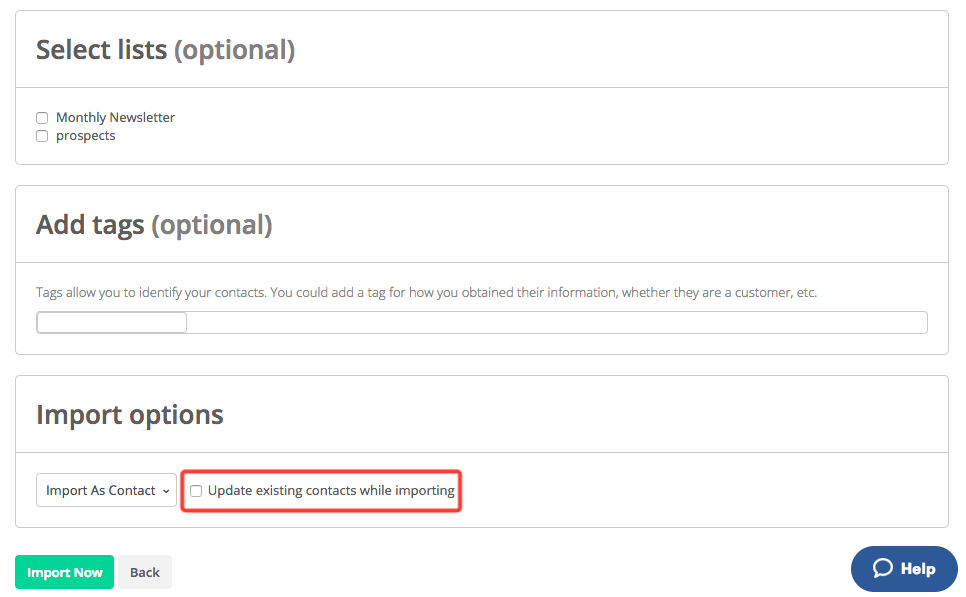
The most efficient way to assign tags and custom fields is to conduct multiple imports. This is the point in your migration where having .csv files of segmented contacts is useful. Simply import those .csv files one at a time and assign the appropriate tags to each one. Before clicking “Import Now”, be sure to check the “update existing contacts while importing” button. Doing so prevents duplication of contacts and instead merely updates any contacts you imported the first time.
Similar to importing contacts, we recommend creating tags and custom fields before building out automations and campaigns. That way, assigning tags and custom fields doesn’t trigger any premature messaging. We call it safe segmentation.
Build Forms And Automations
Now is when you prepare to welcome new contacts and engage existing ones. The two items to tackle first are forms and automations.
Forms
Think of forms as doors to your home. Forms are the primary way leads enter your database. When you migrate from your old system to ActiveCampaign, you are essentially moving to a new home. If you don’t provide access to your new home, leads continue to arrive at the old doors, only to find that they lead nowhere.
Although you’re not quite ready to activate the forms, having them built and ready to roll is an important step.
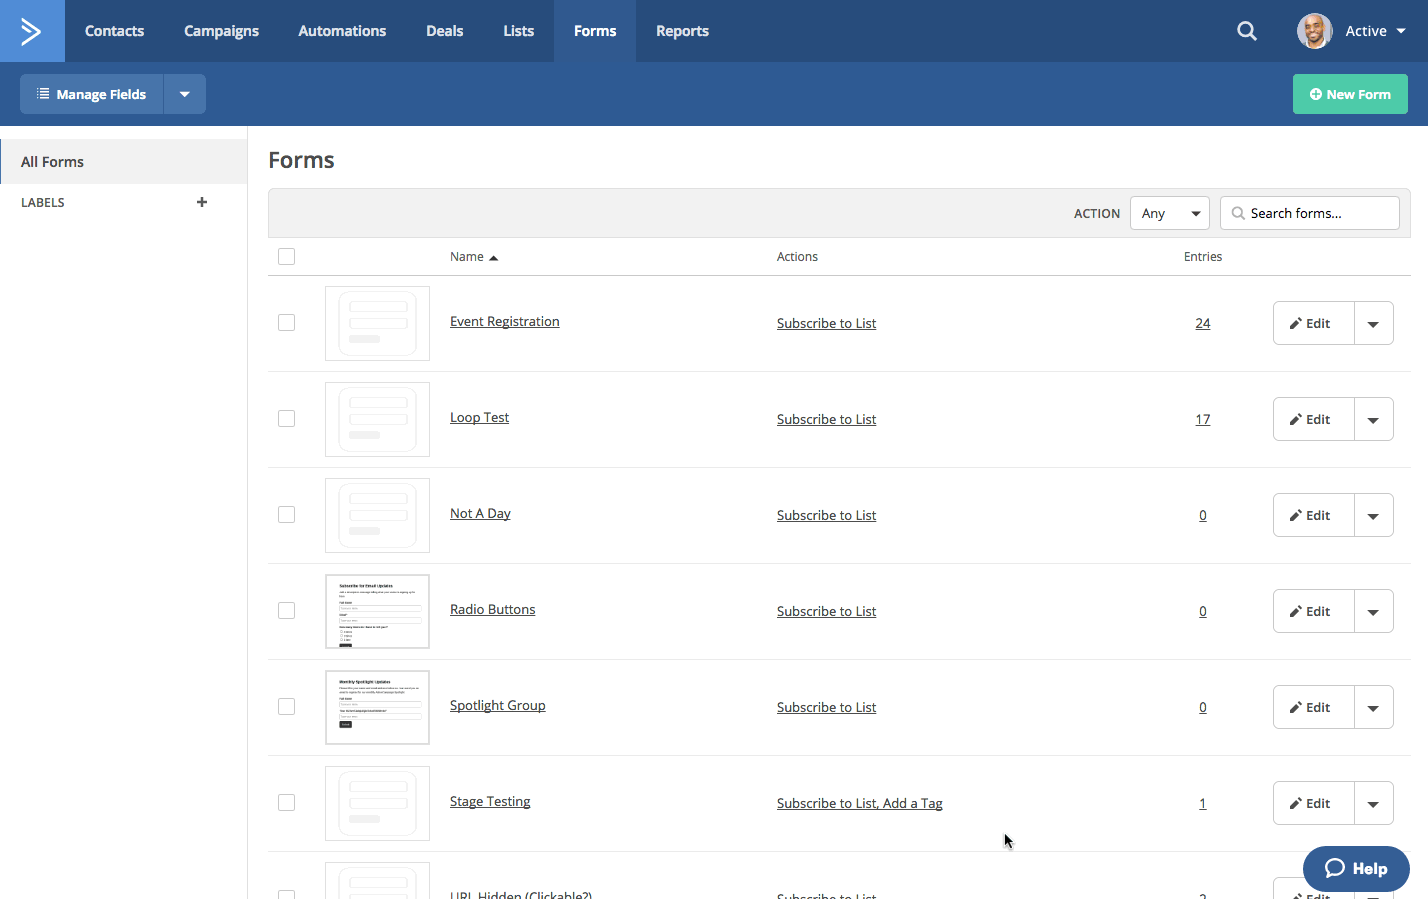
To create forms, click on “Forms” in the top banner. Then click the green “+ New Form” button. You can name your form and choose its style (inline form, floating bar, floating box, or modal). You can also decide what action happens when contacts fill out the forms (add a tag, add to deal, email results, subscribe to list).
In addition to forms, make sure to consider all of our available integrations to ensure your current platforms can easily send and receive data to and from ActiveCampaign.
TIP: Be sure to test each form you create to ensure it leads to the desired “Thank You” page in ActiveCampaign.
Automations
When leads enter your database, you want them to advance through your pipelines until they achieve the ultimate goal. Automations fuel that progression.
You can use everything you created thus far in building out your automations. Think of our Automation Builder as a painter’s blank canvas. Tags, custom fields, emails, deals, forms, and scoring are the palette. You can use any combination of those tools to perform the “art of automation” for your business operations. And with ActiveCampaign’s remarkable flexibility, automation does not sacrifice personalization. In fact, our platform enhances it.
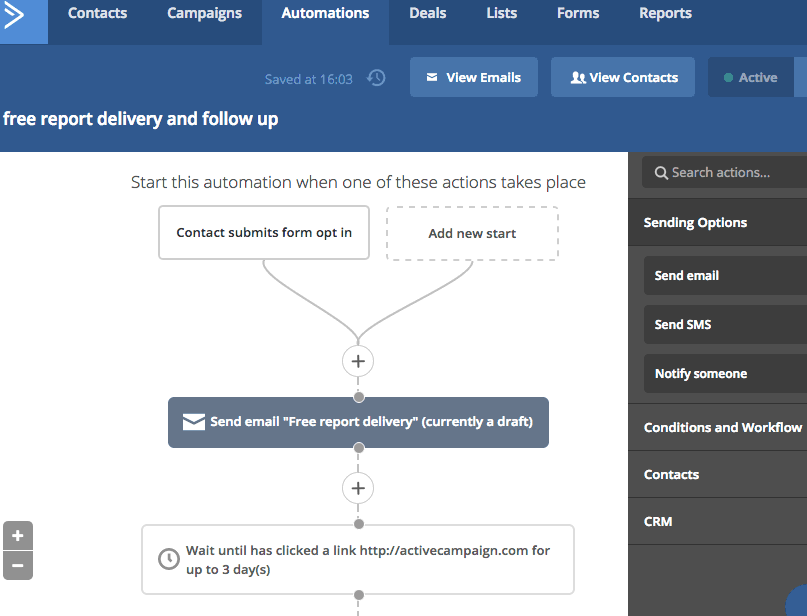
As indicated in the screen recording above, you choose from numerous conditions to split automations and direct contacts through them. Such conditions correlate to each contact’s fit, characteristics, and behaviors. For example, you can build automations that perform different actions for contacts who clicked on a specified link versus those who did not click on the link.
Ideally, you want all contacts to get to the same final destination — buying a product, for instance. By building automations, you create personalized routes for contacts to travel based on their unique histories with your business, therefore increasing the odds that contacts achieve the goals you have for them.
Aside from tags, custom fields, and scoring, goals are another tool in our Automation Builder that help create powerful automations for your business. Using goals allows you to measure your marketing’s effectiveness and serves to automatically nudge goal-achieving contacts forward in the automation.
For the places in your automations where you want to send a message, simply put in email placeholders to start. After you build some automations, you can go to the next step, which is filling in the content. For now, create only the email shell; doing so allows for easy content placement.
The first automations you build should be revenue-sensitive. That way you have an immediate path to profit in place.
Setup Emails
While much of ActiveCampaign’s allure rests in its ability to automate your entire marketing process — not just email — the platform recognizes the importance of top notch email communication and helps facilitate it.
Thus, after you’ve created tags and custom fields, we recommend recreating the emails from your old system as email templates in ActiveCampaign, rather than importing old templates. You can do so by replacing images and text in our templates with proven content from your past. All that takes is some simple copying, pasting, and uploading. That way, you can start fast once you flip the switch.
To access our email designer, click on “Campaigns” in the top banner. Then, click on “Manage Templates” to bring up the designer.
ActiveCampaign’s email designer has drag and drop capability for email creation. Plus, all emails you create are mobile friendly. For more guidance on our email designer, check out these help articles.
TIP: Be sure to use ActiveCampaign’s template categories. Doing so makes your life easier when you’re adding emails to automations.
Flip The Switch
At last, you’ve reached the final step. You imported your contacts and assigned them tags and custom fields. You built automations and filled them with quality content.
Now, you are ready to flip the switch and engage existing customers and welcome new leads to your database.
That process is twofold.
First, you need to cancel your old account and replace all forms on your web assets with ActiveCampaign webforms. Remember, forms are the “doors” your new leads use to enter your database.
Next, set up the third-party integrations that will add contacts to your database.
Following those steps ensure that every form and integration on your website and landing pages now leads to your ActiveCampaign database.
Setup Your CRM
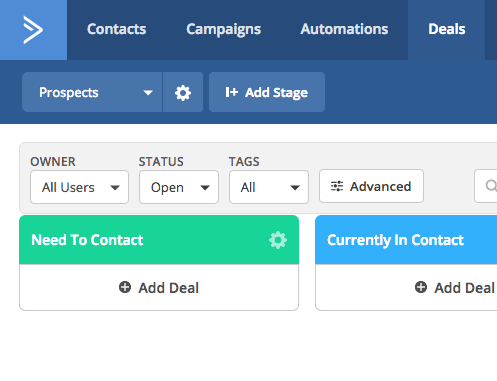
Now that leads are entering your database, you should focus on how you’ll manage them. Thankfully, our Small Business and Enterprise plans include a comprehensive CRM, found by clicking “Deals” in the top banner.
Many users find great benefits to fully automating both external and internal processes to run their marketing and sales, and our CRM is capable of doing exactly that.
It consists of pipelines and stages, which together with the Automation Builder present unlimited possibilities. You could build, for instance, a sales pipeline, designed to convert contacts from leads to customers. Additionally, you could craft a fulfillment pipeline that automates product shipment.
Each pipeline you build contains stages, which you customize, as well. When contacts meet the conditions you set for stages within a pipeline, they are automatically added to the appropriate stage of said pipeline.
Setting up your CRM is a process in itself, and that’s why we recommend waiting to do so until you migrate and get the account up and running. Be sure to check out our detailed guide to our CRM.
TIP: Feel free to create as many pipelines and stages as you see fit. ActiveCampaign does not limit how many you can create.
Closing Remarks
Congratulations! You’re now ready to roll in ActiveCampaign. We hope this guide gives you a roadmap for migrating to our platform. We’re always working to determine best practices to share with our community.
If you found this guide helpful, please feel free to share it with your peers. Have you hit a snag with something not referenced above? Let us know in the comments below!
