Campaigns are part of the core of ActiveCampaign — it’s in the name, after all. But our options are more robust than your basic email marketing platform. So, let’s dive into the types of campaigns you can leverage with ActiveCampaign.
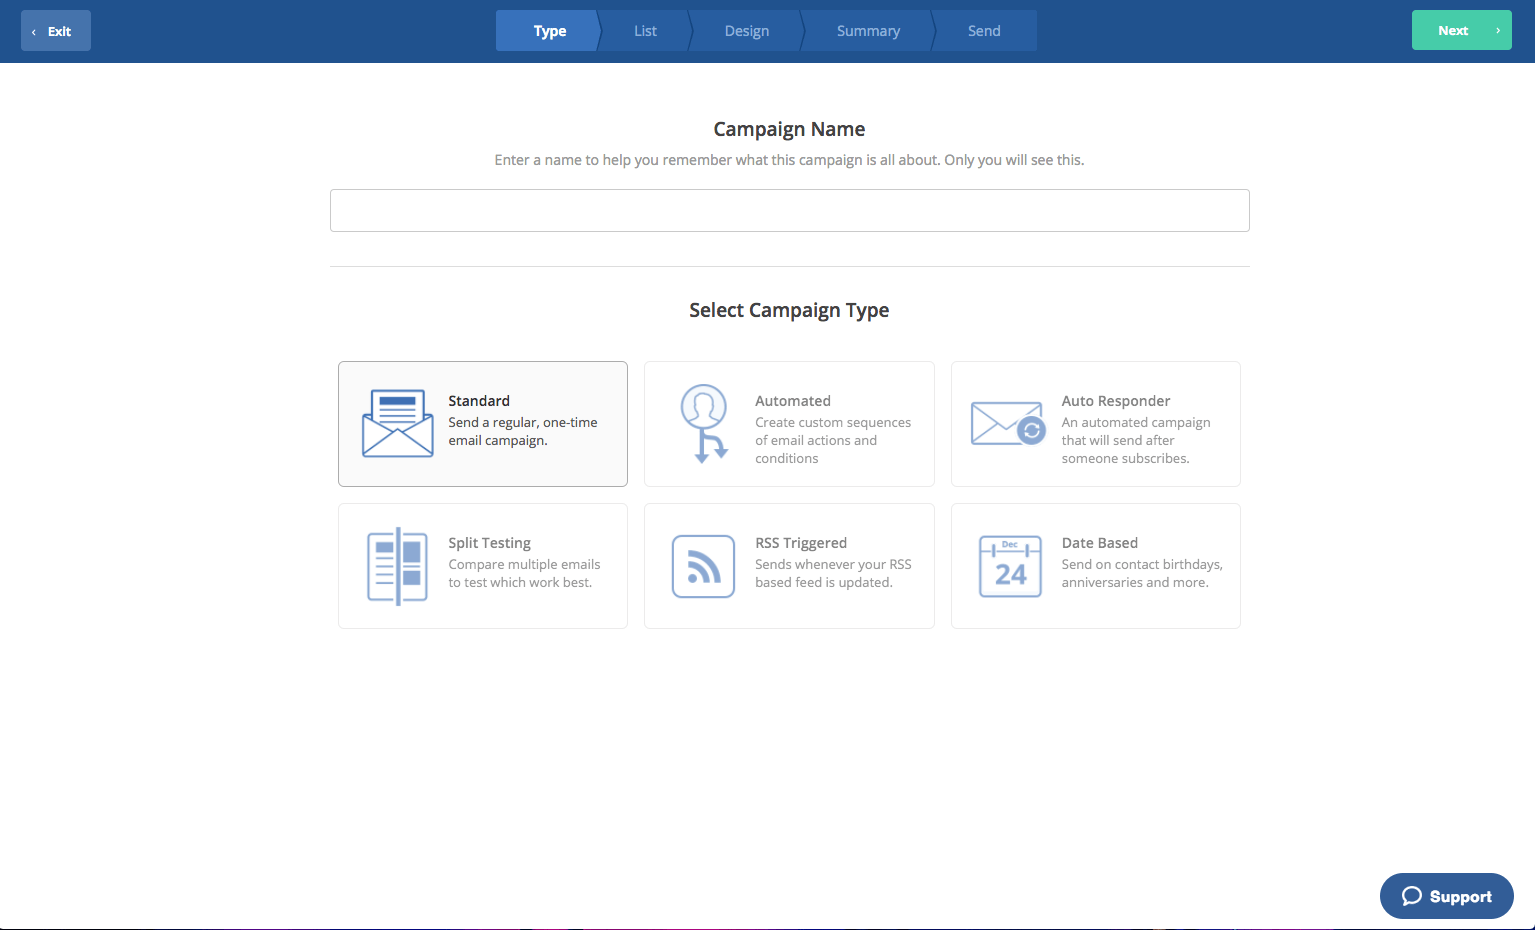
All of our examples will be based on the six campaign types in the Campaigns tab: Standard, Automated, Auto Responder, Split Testing, RSS Triggered, and Date Based.
Standard Campaign
The Standard Campaign “sends a regular, one-time email campaign”. Let’s say you have an abundance of holiday stock, and you want to send a last-minute email blast to all of your shoppers about a 50% off sale. This isn’t the type of campaign you’ll run regularly, so no need for an automation. You just need to get your message out quickly.
The very first step when you are beginning any campaign is to select the list of people to whom you are sending your email. Because this is a standard campaign, you’ll want to chose your list carefully to avoid spamming your contacts. In this example, we want to chose people who have made a purchase, and those who may be likely to convert with a coupon.
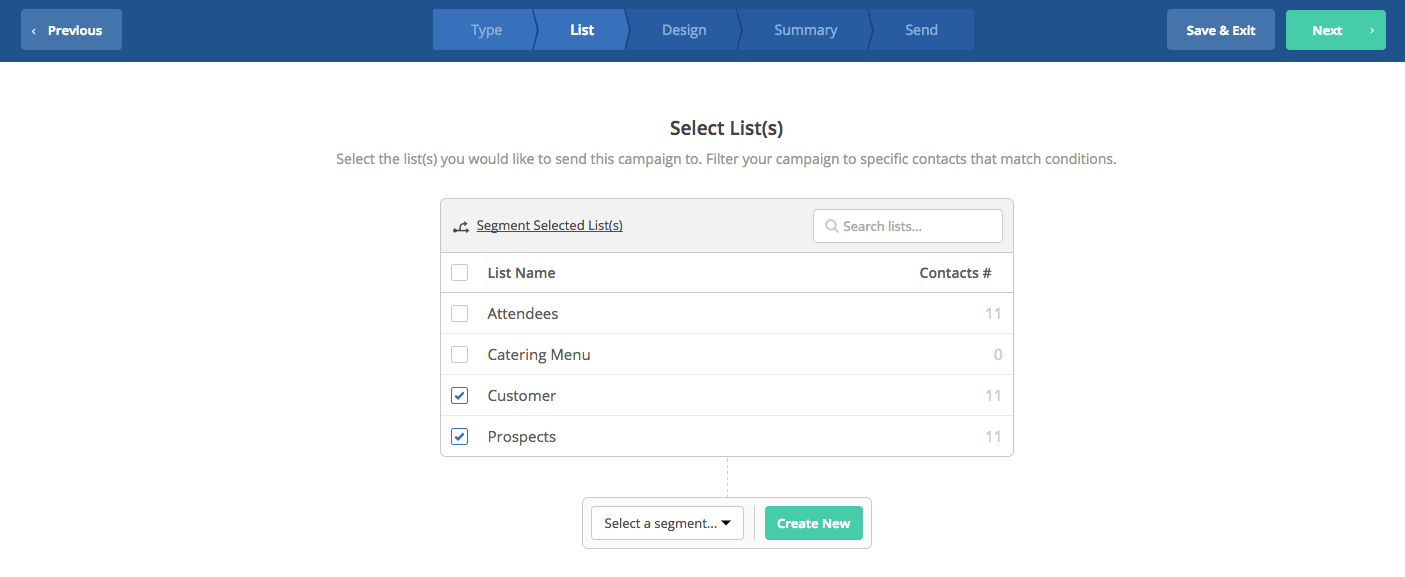
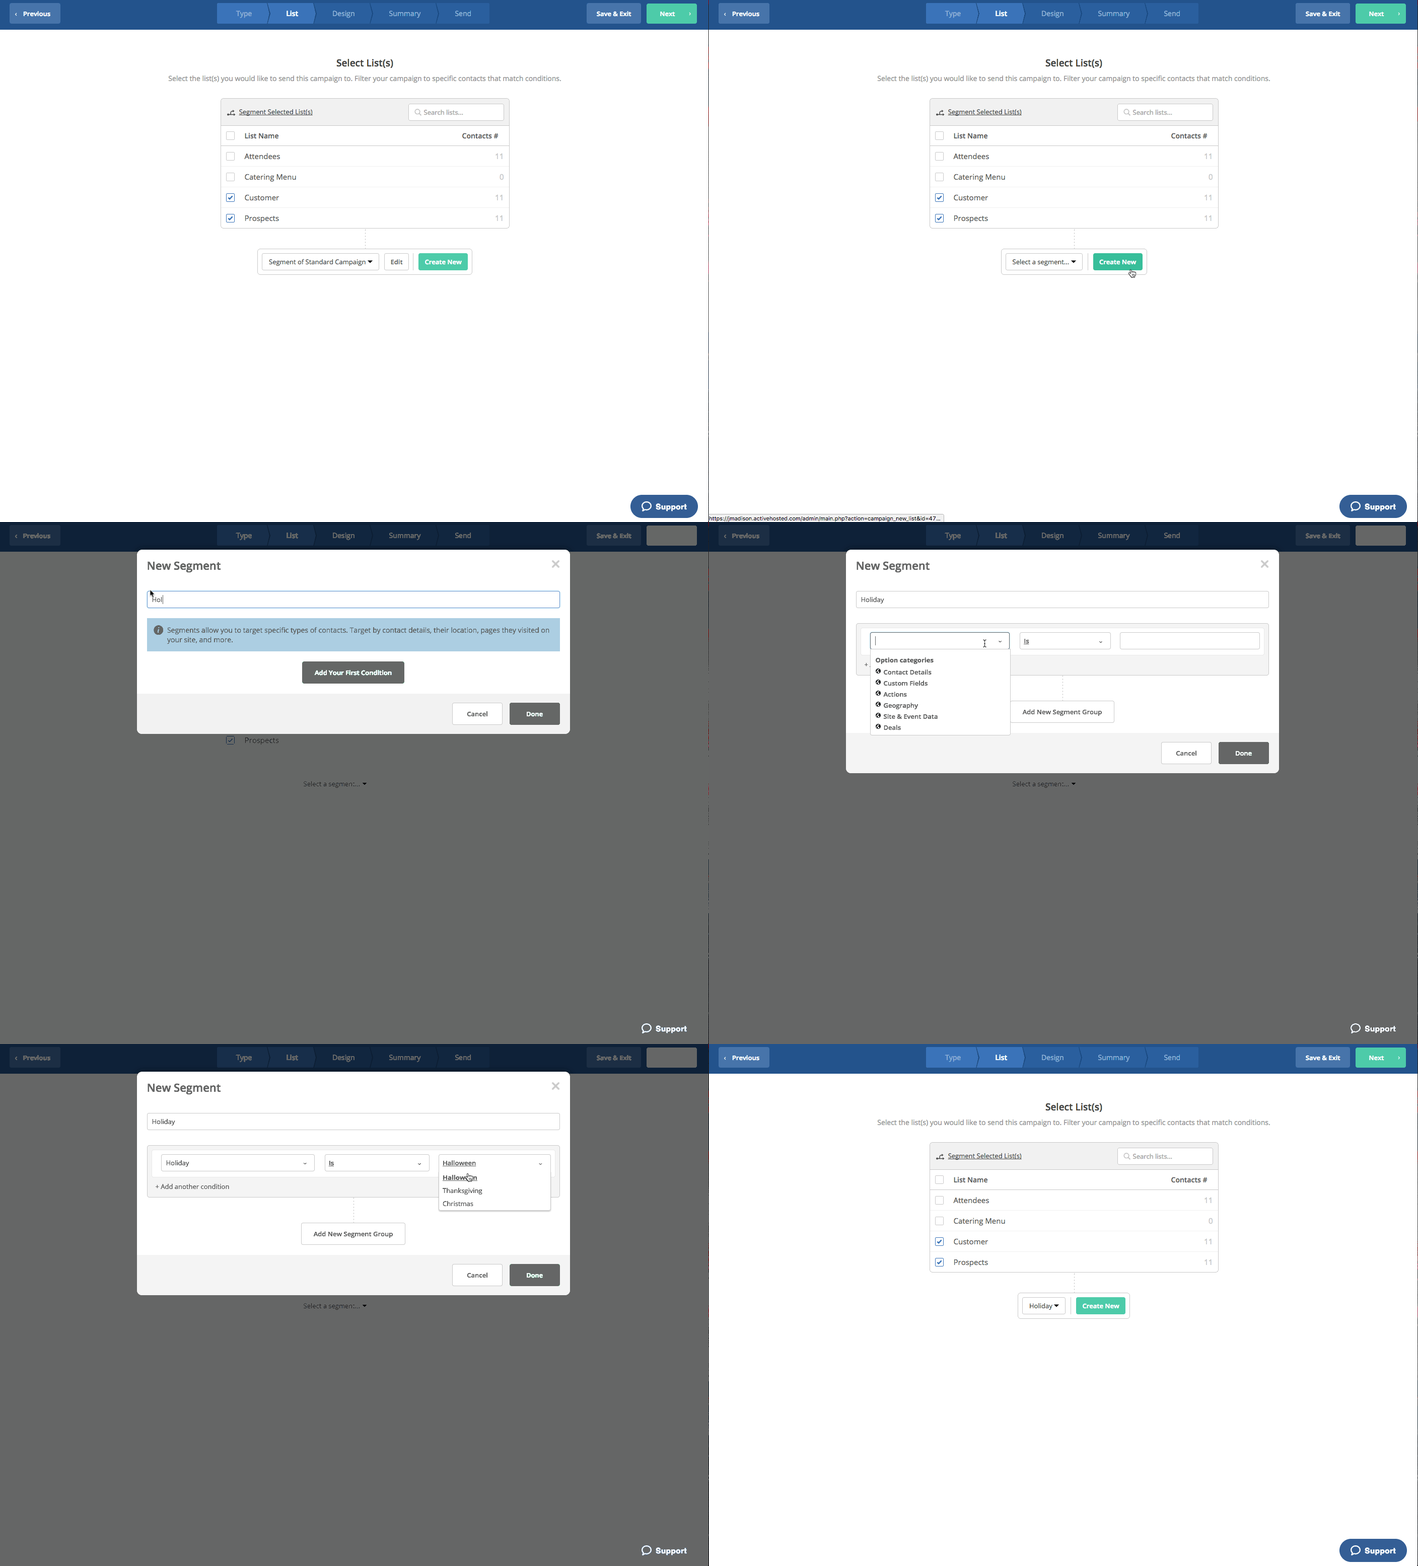
After you select a list, you will be prompted to select a segment of your list, if you’d like. This way, you can easily target a subset of contacts within your larger list if you’d like to send a particular message pertinent to their interests.
You also have the option to create a new segment while creating your campaign. Simply select “Create New” and input your conditions. This gives you the flexibility to determine your specialized segment from within the Campaign builder.
Note: All pre-existing segments will display via the drop down by default. These segments are created using the Advanced Search under the Contacts page.
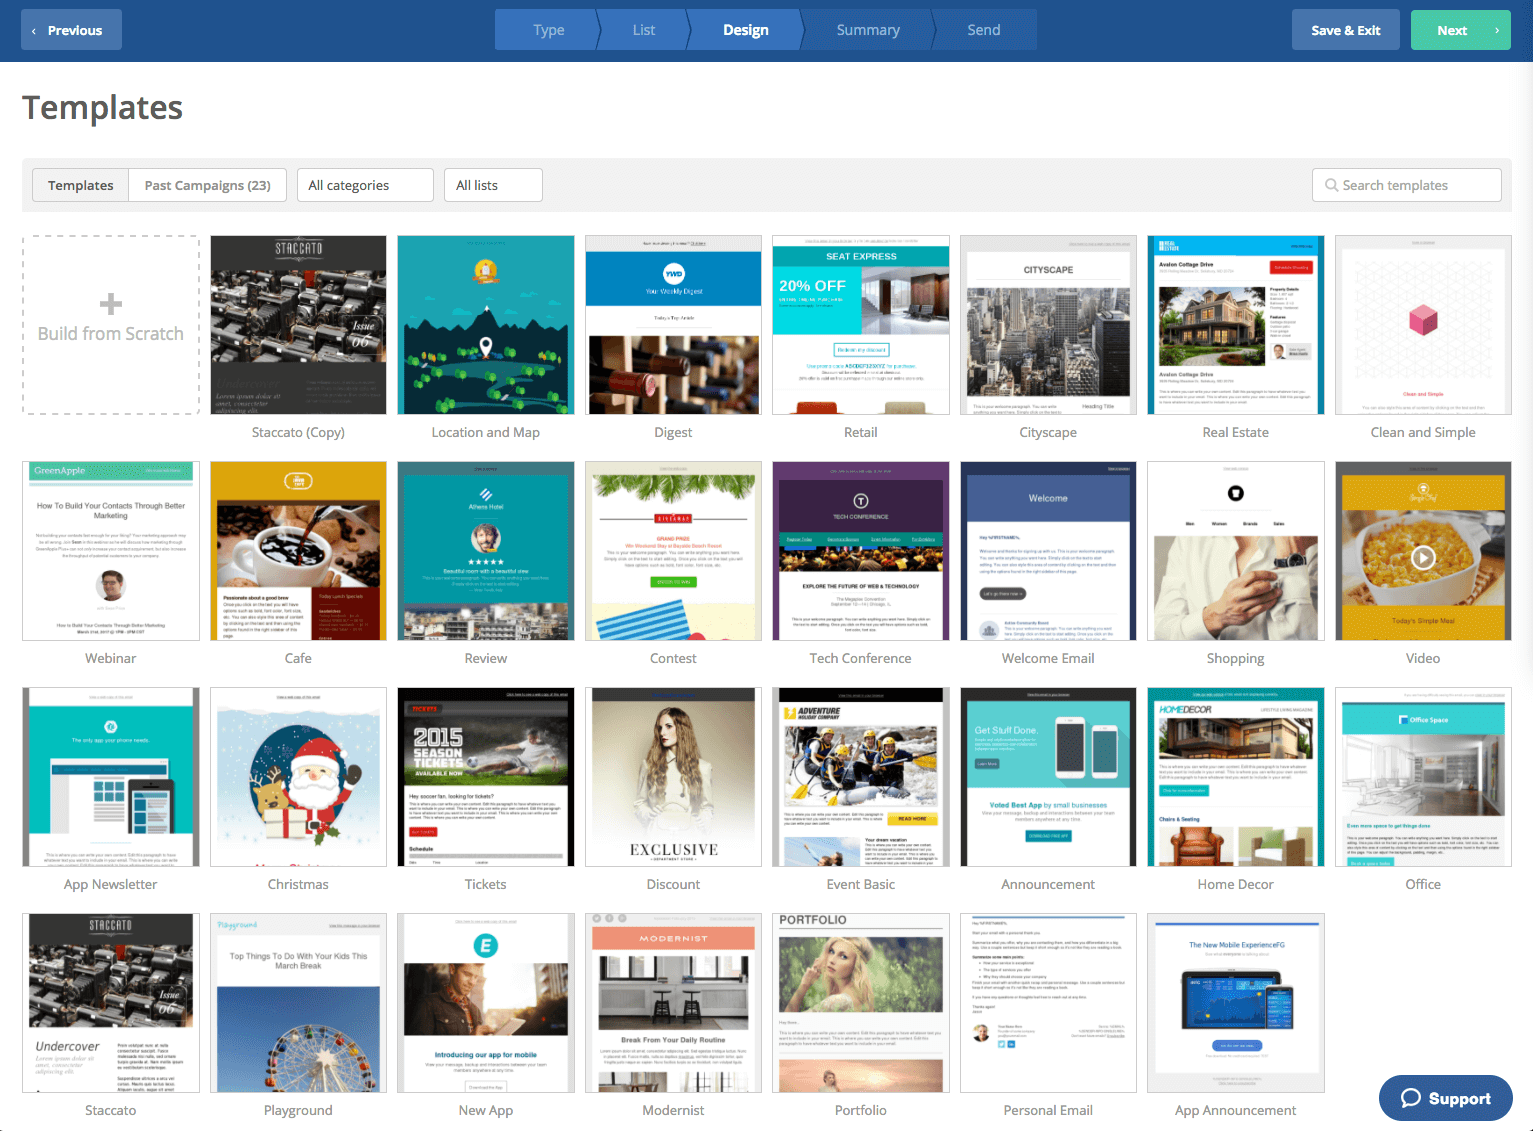
After selecting your list (and segment, if applicable), you’ll reach the Templates screen. Here you can select from the many pre-designed emails from ActiveCampaign, labeled by how they can be best used. From a welcome email to a webinar, or a contest to a discount, there are many templates you can quickly personalize to meet your needs. You can also easily build an email from scratch, using your own images.
After making your selection, you’ll be asked to provide the sender name and email address, as well as the email subject. You can always change this later, if you’d like.
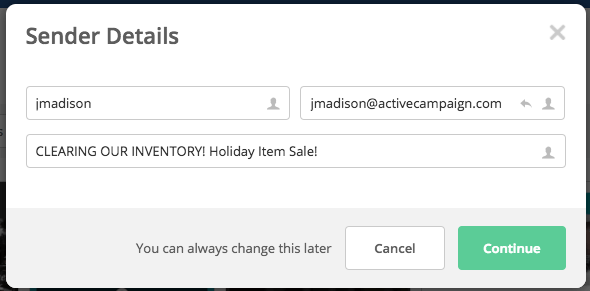
Once in the email builder, it’s easy to create an email for your contacts. After it’s complete, you’ll be able to review the Campaign Summary, including your subject line, selected lists, and other options as relevant. You can also send a test email, or preview the email in an email client or desktop preview.
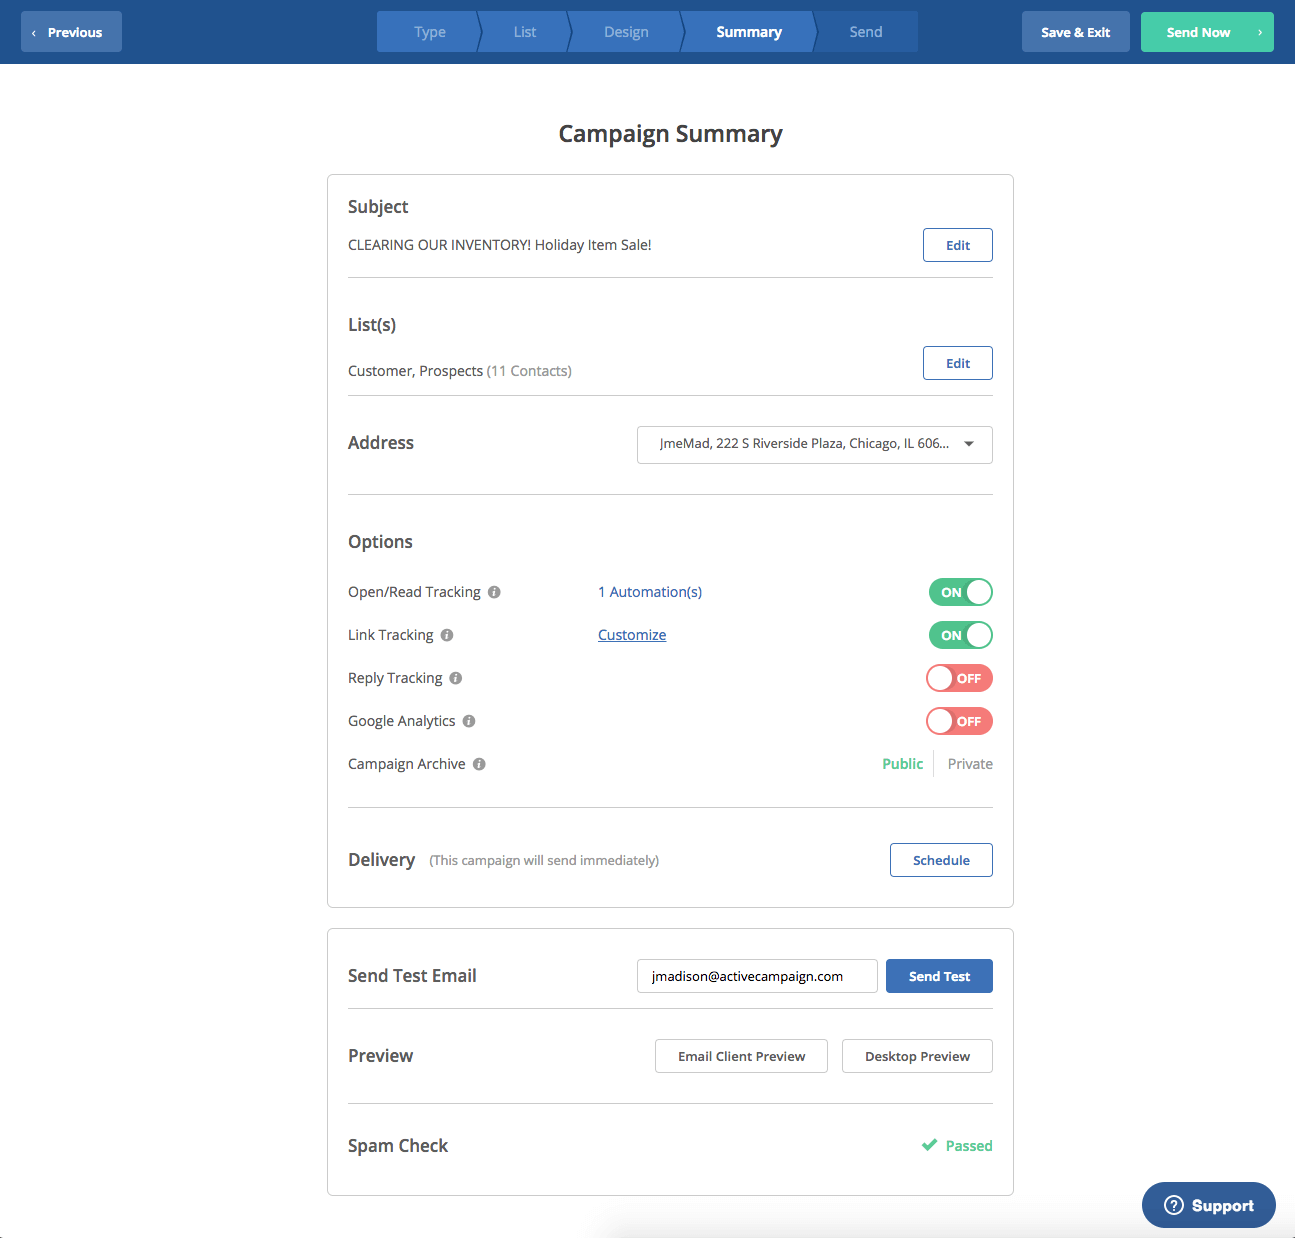
The Campaign Summary will let you know if you have any last minute issues to resolve. You can select “Save & Exit” if you’d like to return to your campaign later, Or, simply click “Send Now” to send your email campaign!
Automated Campaign
An Automated Campaign allows you to “create custom sequences of email actions and conditions.” The beginning of an automated campaign looks like the beginning of an automation; contacts will enter your campaign based on a trigger.
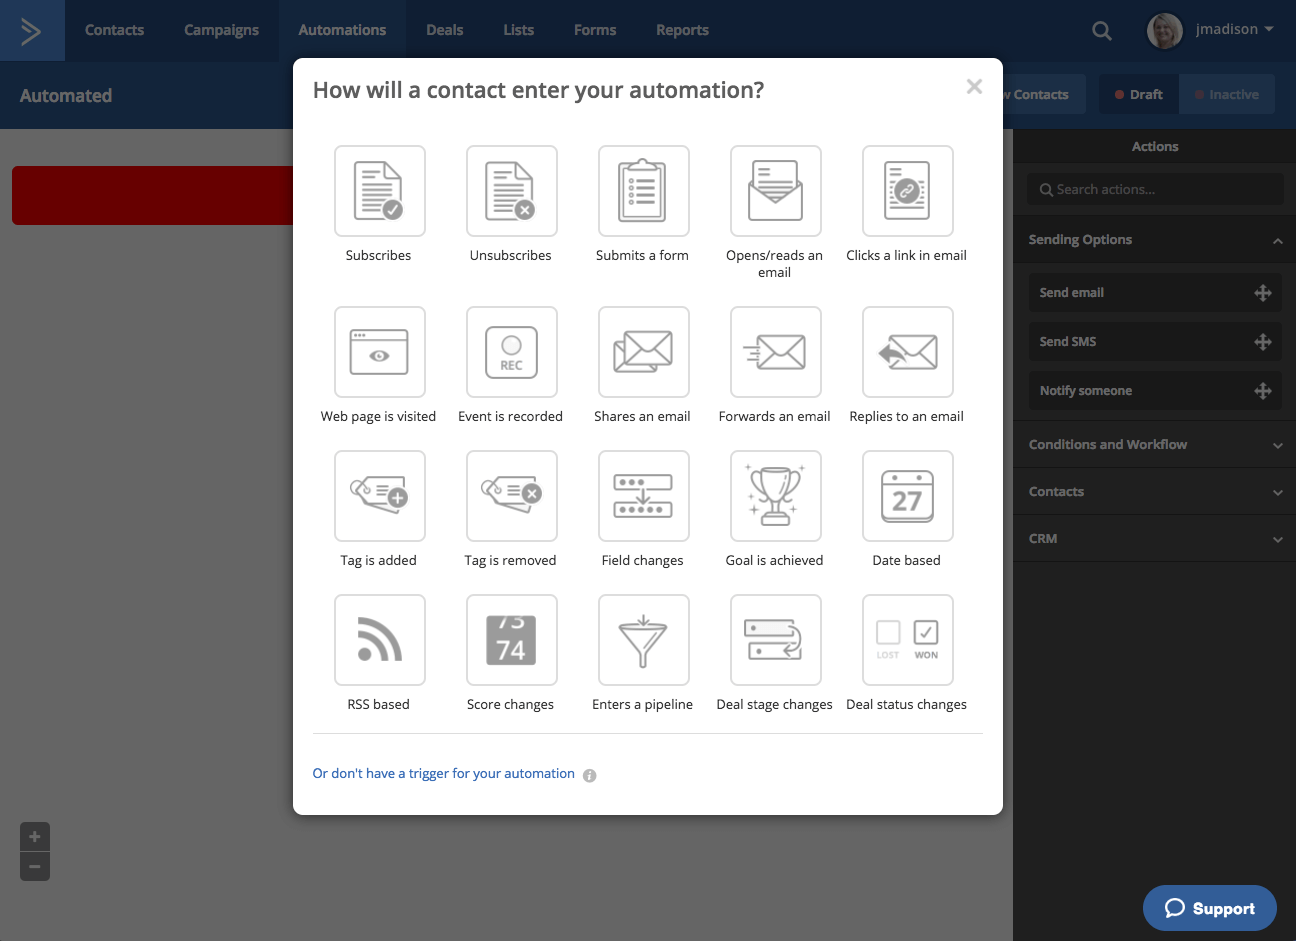
For our example, we’ll say that a contact has completed the form to sign up for our newsletter. After they complete the form, we will automatically send them a welcome email. You’ll note that the Automations tab is now selected – you have been redirected from the Campaigns tab.
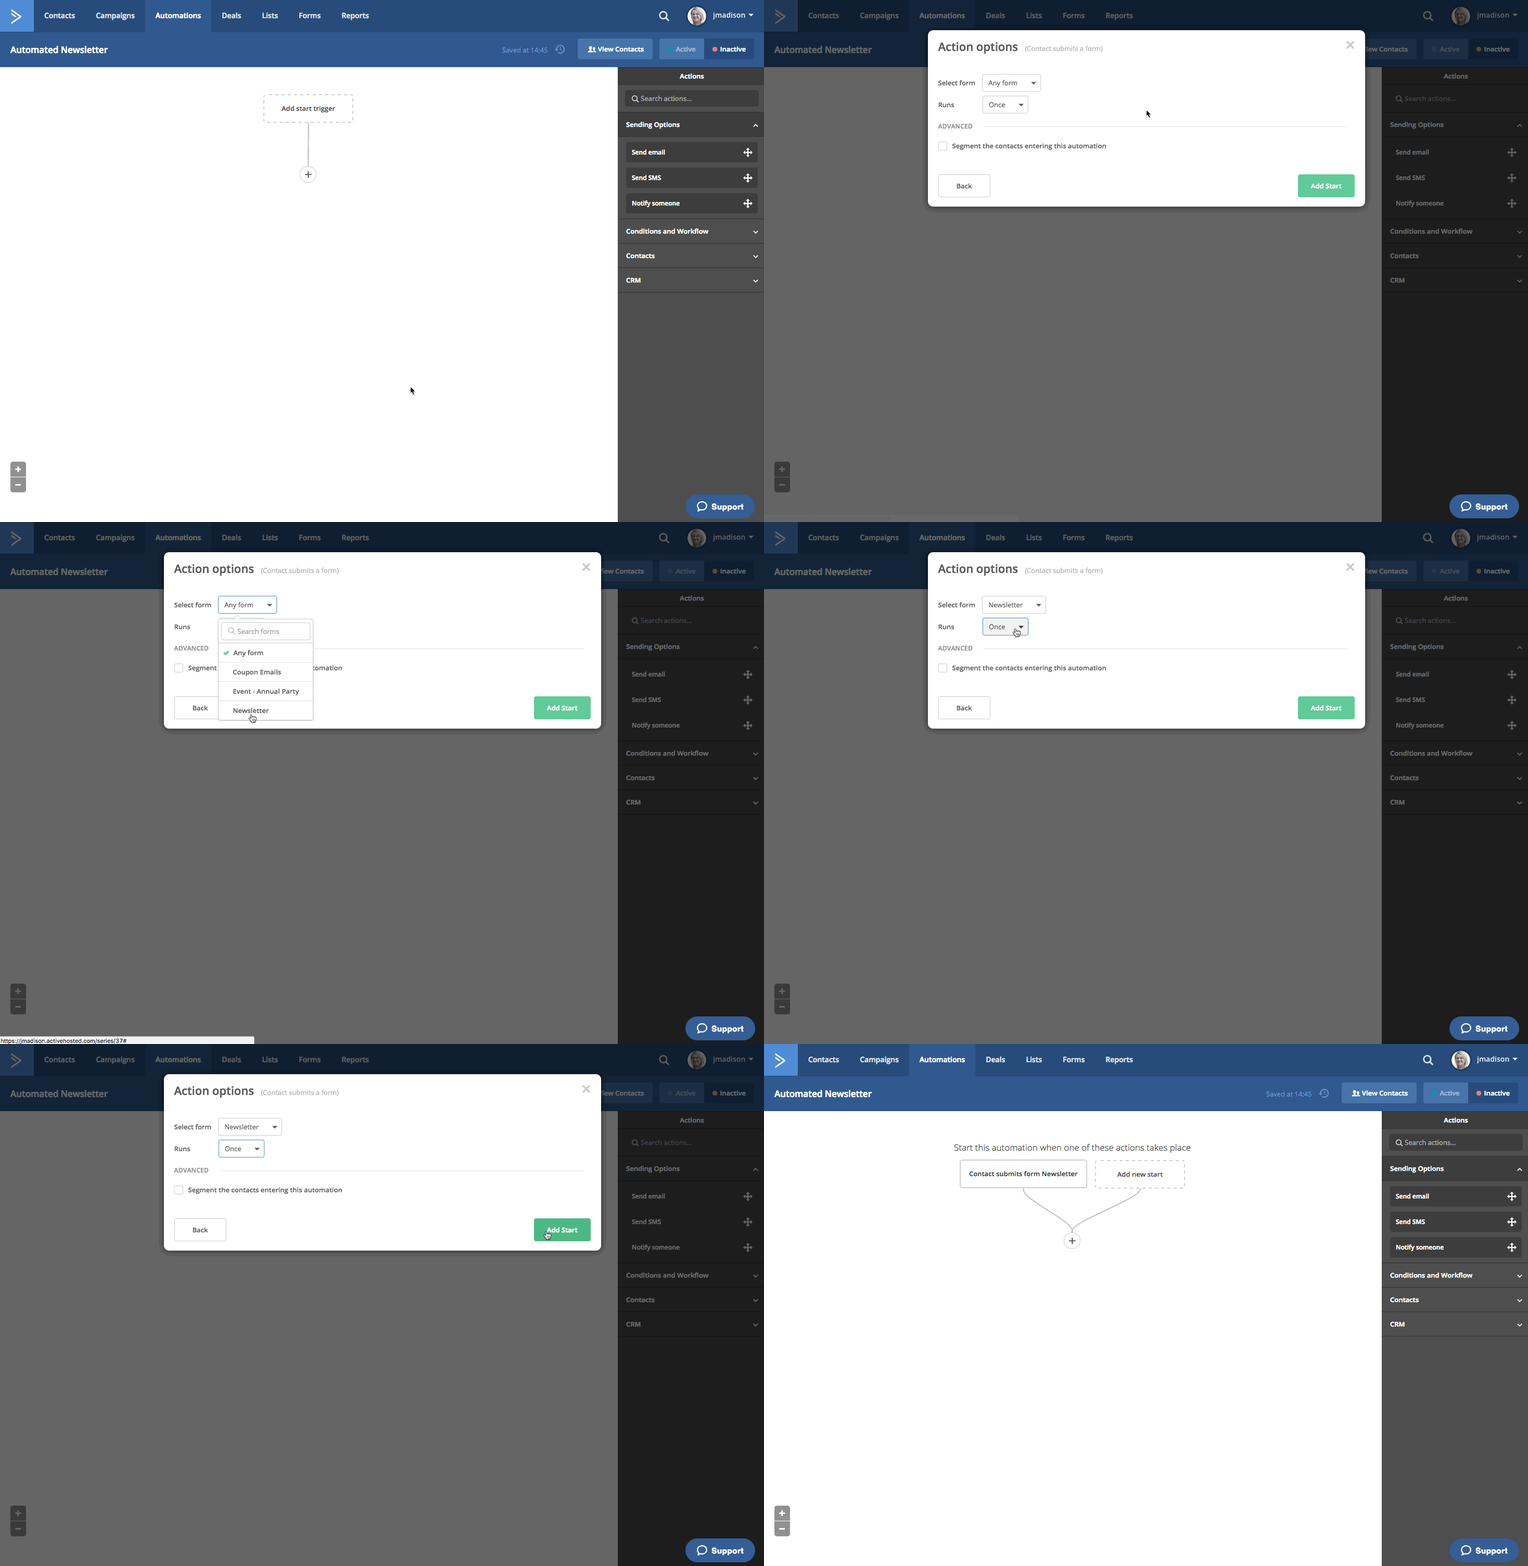
Since the Automated Campaign redirects you to the Automations tab, you now have more flexibility. You can react to your contact’s actions after sending your welcome email, which is edited in the email designer. You can now continue in the automation builder, creating a path for your new newsletter contacts to follow.
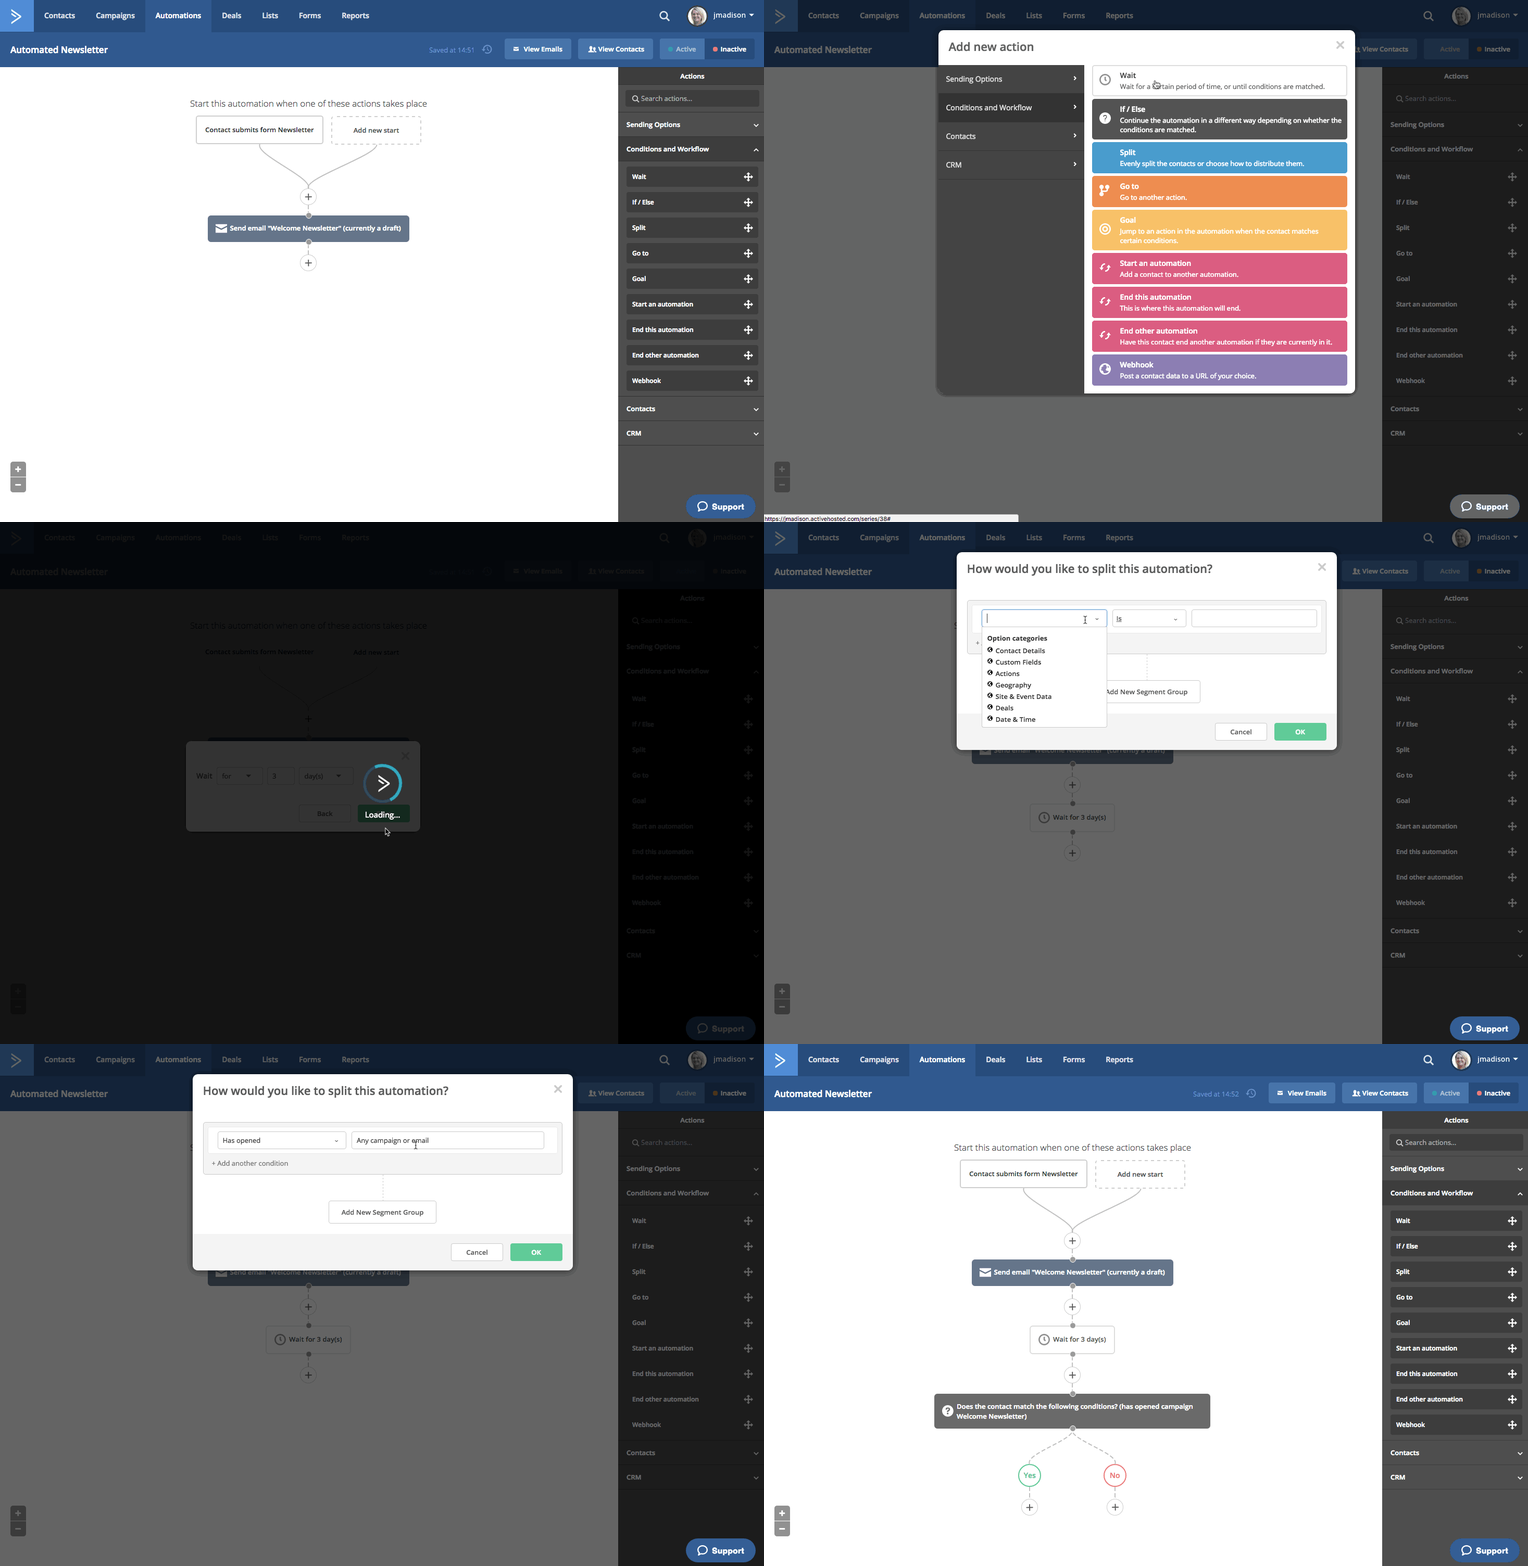
Note: If you save and close an Automated campaign, remember to look for it in the Automations tab.
Auto Responder Campaign
An Auto Responder campaign is “an automated campaign that will send after someone subscribes.” In this way, an Auto Responder can be similar to an Automated campaign. However, the Auto Responder is much more straight forward, and does not have any additional automation capabilities; it’s an easy way to respond to anyone who is subscribed to a particular list (and segment, if applicable).
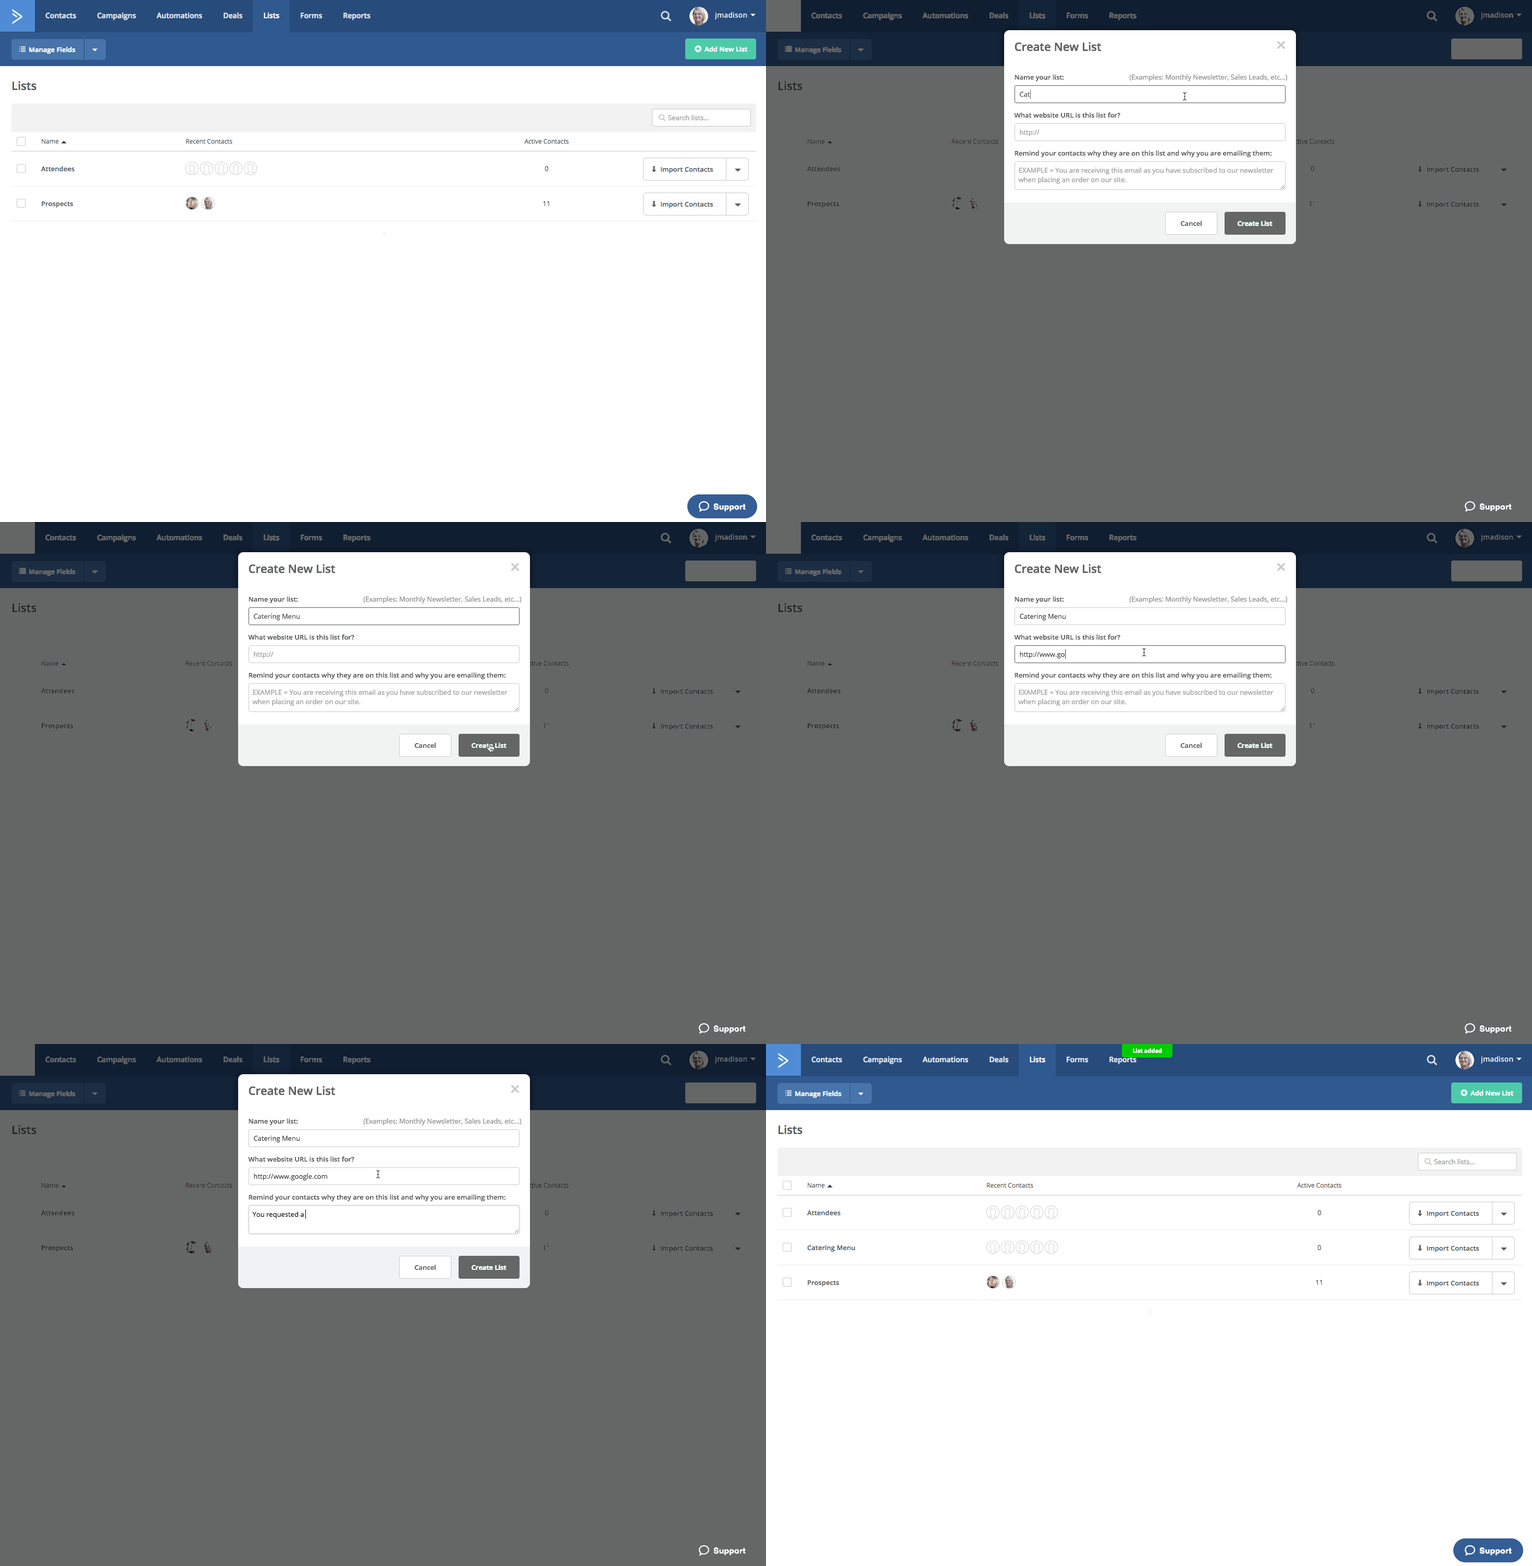
Another example: you have a catering business, and you want everyone who wants to download your catering menu to give you their email address. First, you can create a list in the List tab for “Catering Menu.”
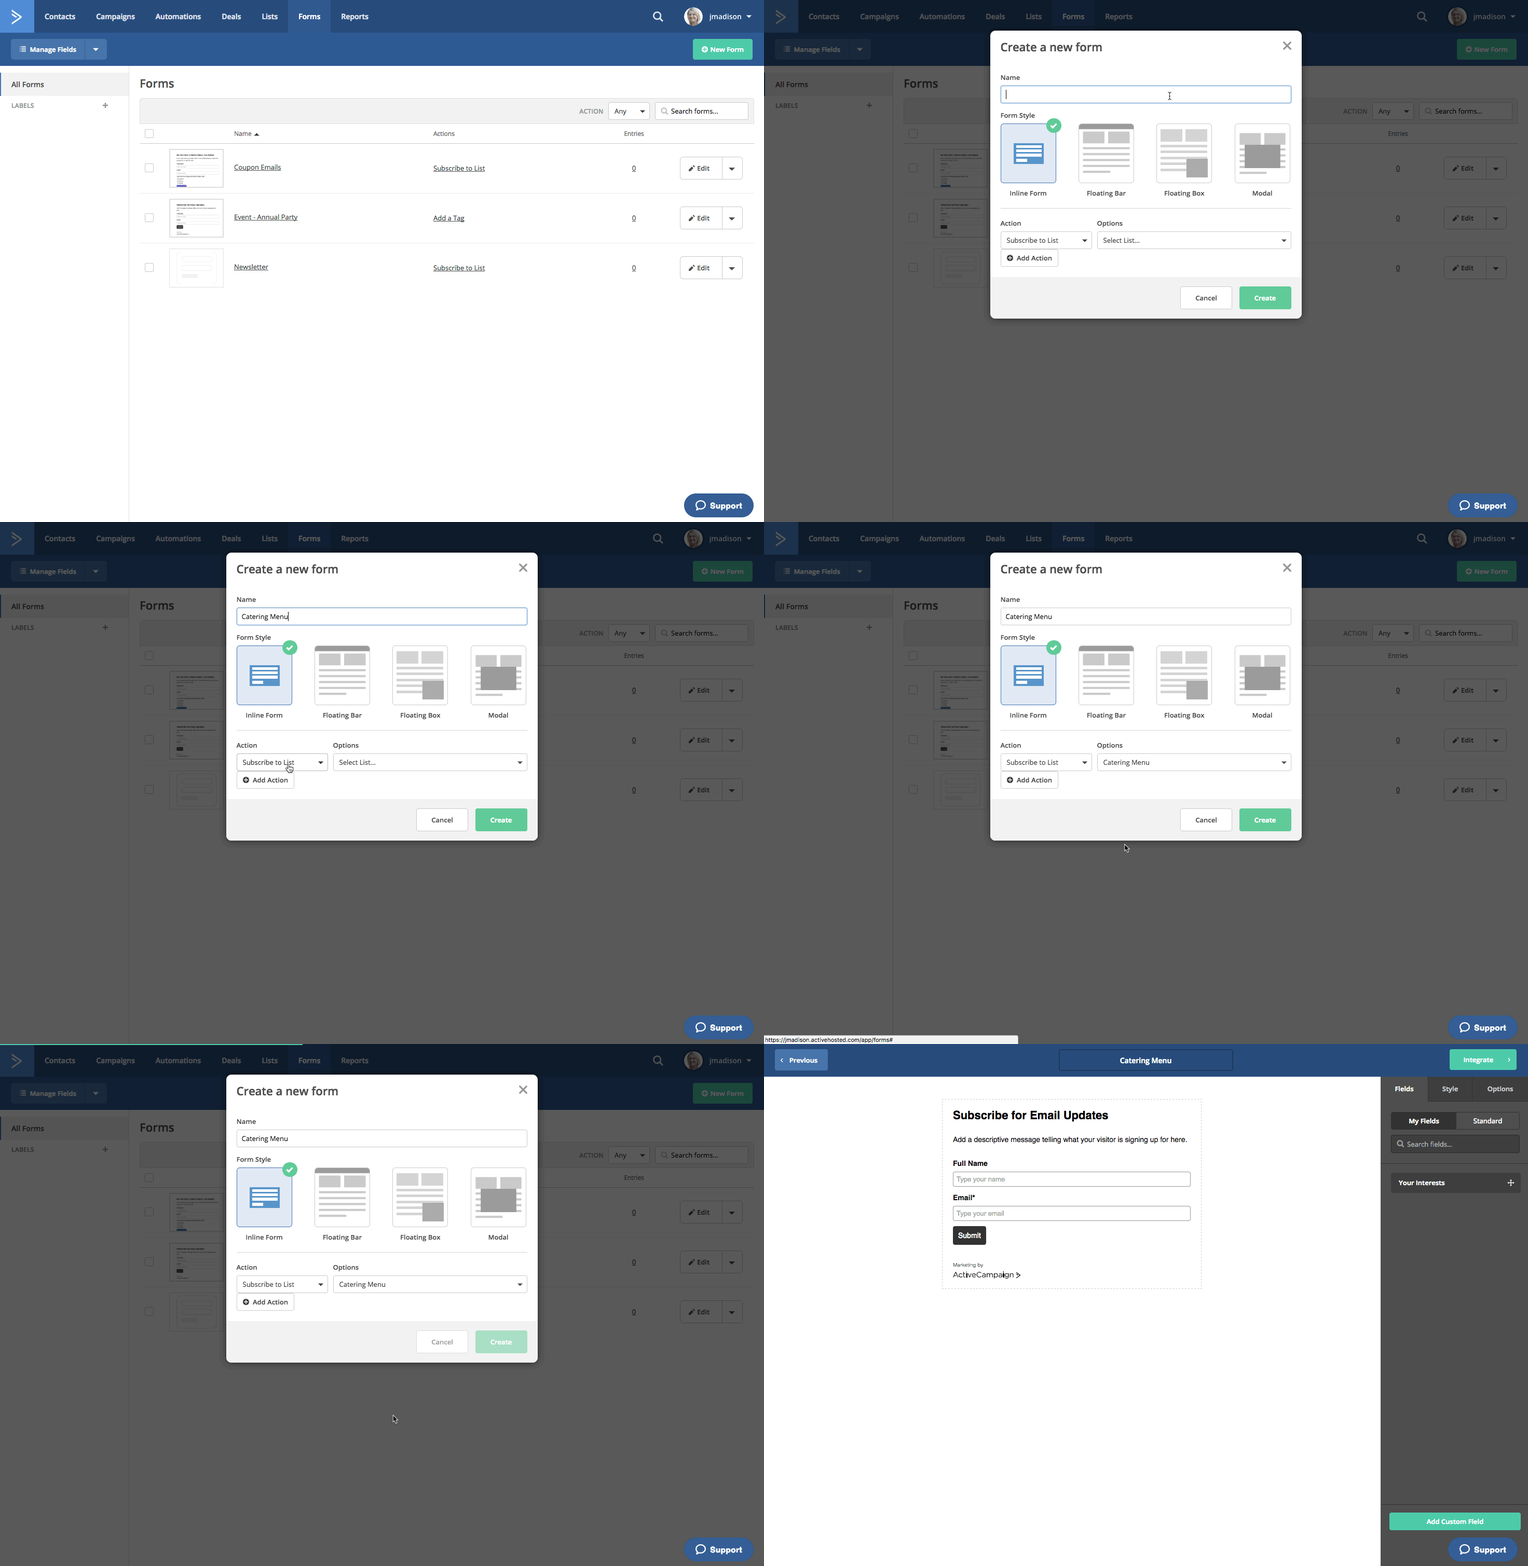
Then, you can create a form for people to request your menu. When they complete the form, they will be automatically added to the list “Catering Menu.”
Now we can create an Auto Responder that will send anyone who completes the form “Catering Menu” to the list “Catering Menu.”
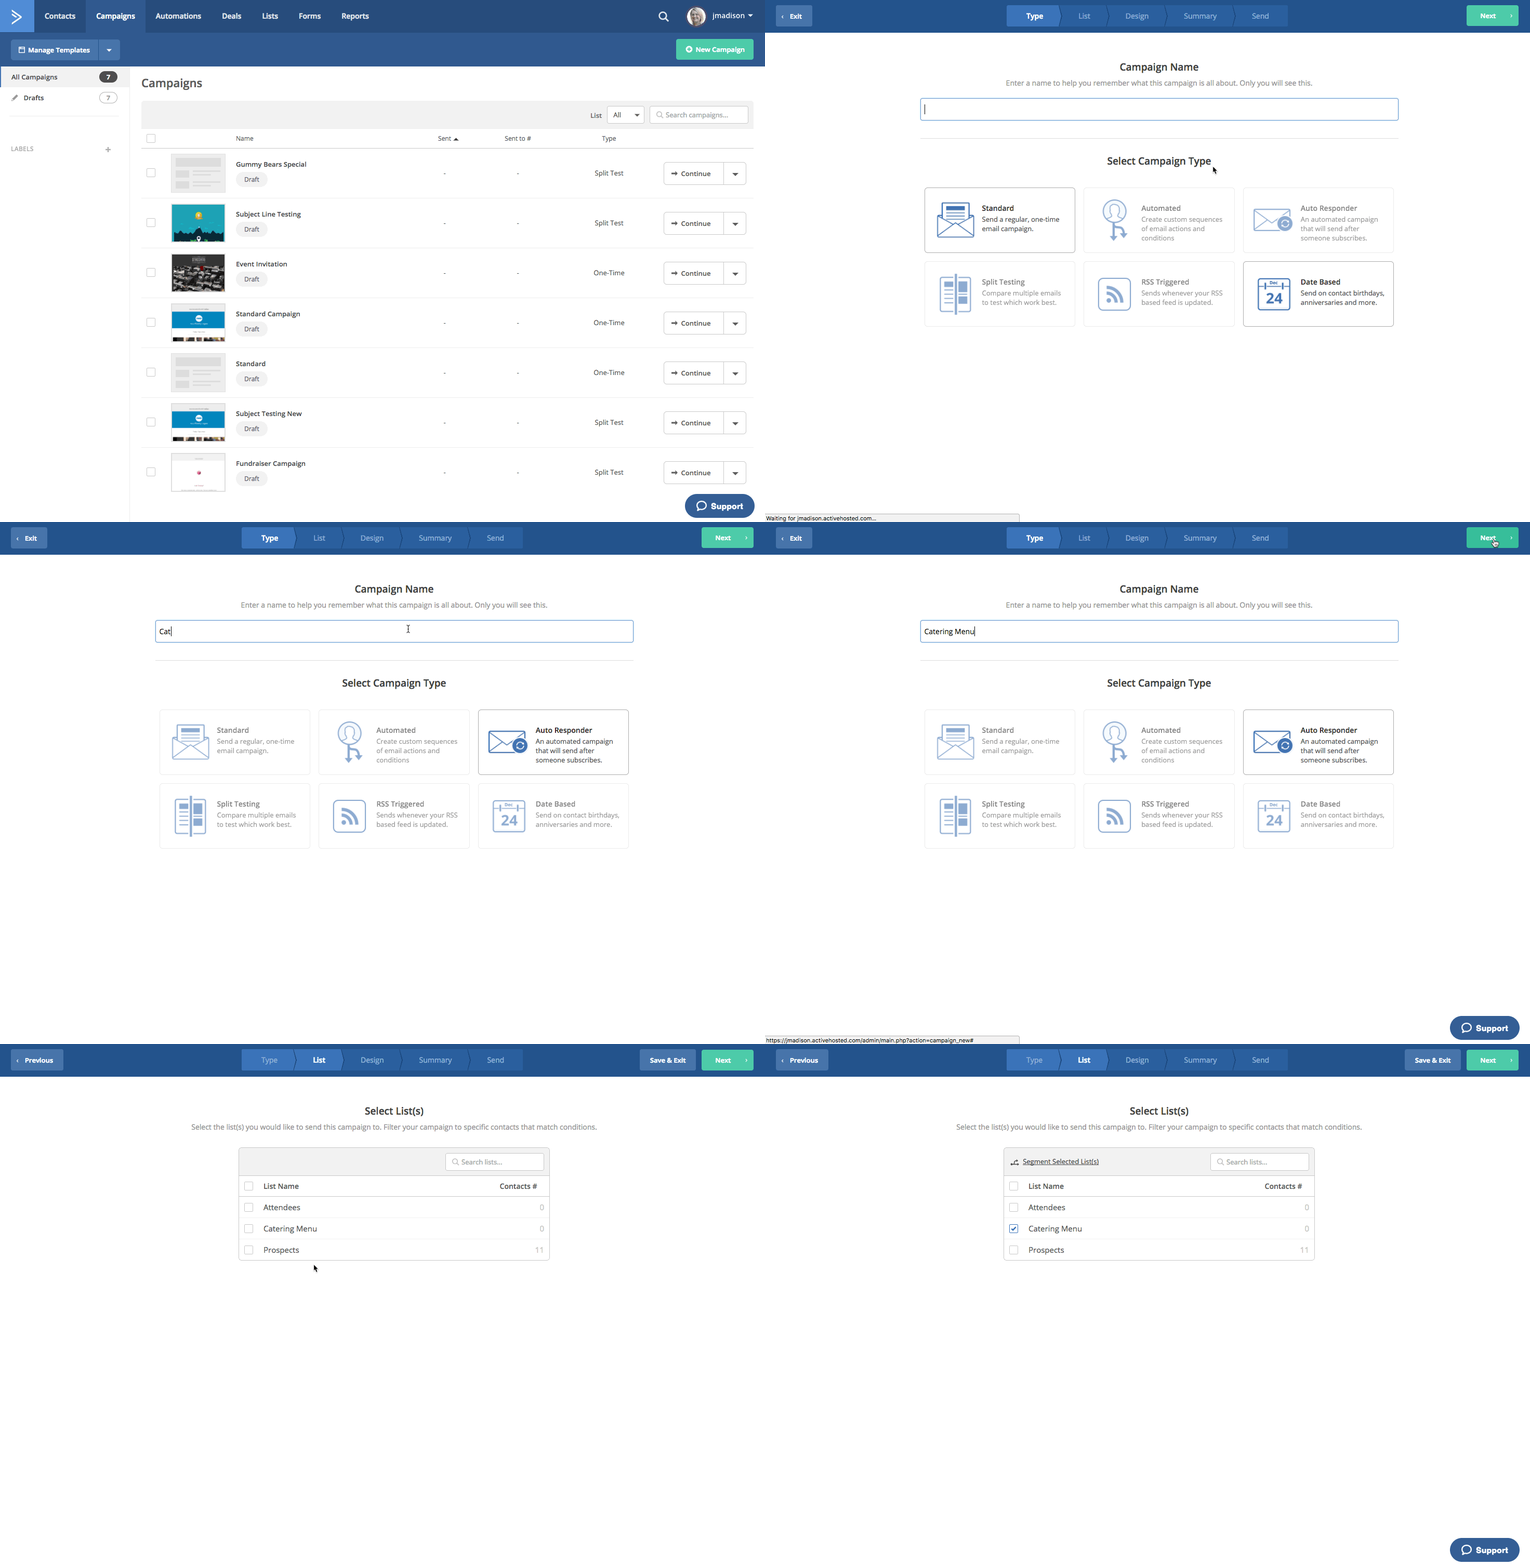
From here, you go to the email editor as per usual. There are no additional automations to create, as this campaign just responds after a contact meets the conditions of being on a particular list or a segment. Perhaps you’ll want to reach out to the group of people who have requested your menu if you have a seasonal update in the future, but for today, you just want to be sure they will get your email immediately. The Auto Responder is the choice for you.
Split Testing Campaign
Split Testing email is a powerful tool, allowing you to “compare multiple emails to test which works best.” This is where you can get creative, and try multiple approaches to your content. If you’re an online shoe retailer, and you are wondering if people will open emails with an informative subject line, or a funny subject line. We’ll pick the Split Testing campaign to give it a shot.
Split Testing gives you the “Select List” prompt found in other campaigns, but it additionally gives you the choice to “Select Split Test Type.” Your options are:
- Test different email subjects and/or information
- Test different email subjects, from information, and/or email contents
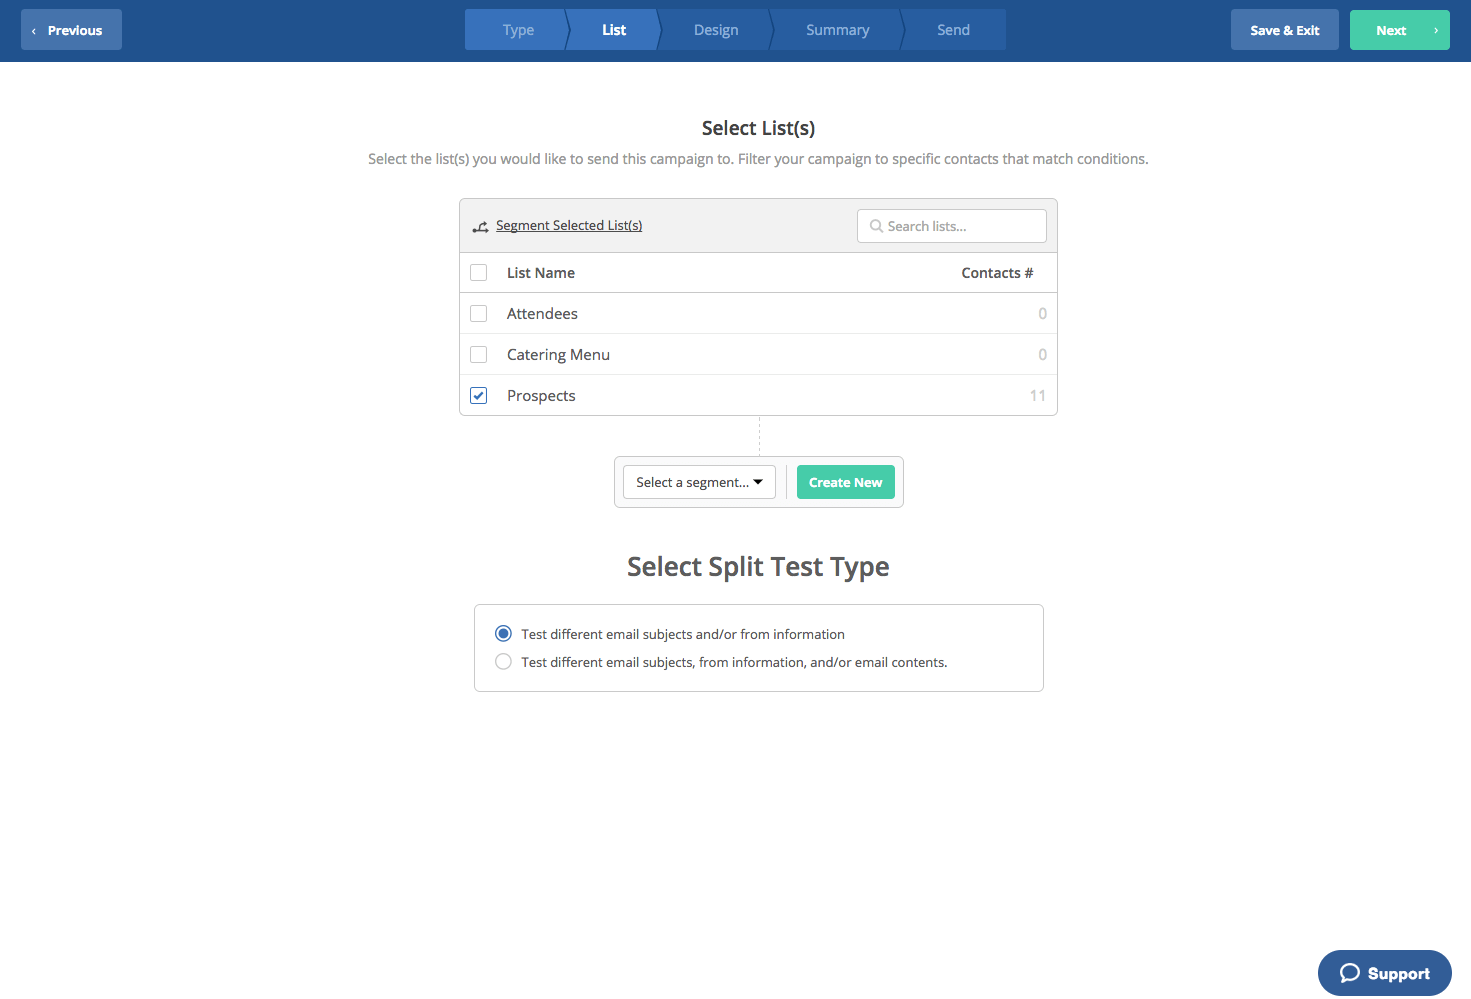
Think of it as testing the content at the top of the email, before they even open it, versus testing the sending information and altering different content within the email. You can either be testing:
- Who should send emails to your contacts (name/email address), and/or what type of subject line they respond to
OR - All of the above, plus, what type of content helps people convert
Best practices indicate that testing one change at a time is the best way to see how your contacts respond. If you send several split test emails, all from different people, with different subject lines, and different content, you may be unable to determine what contacts respond to, positively or negatively.
In our Split Testing, we’re sticking to testing subject lines. Under “Select Split Test Type,” we’ll choose the first option, as shown in the image above.
When you create your email, you are asked for the sender and subject information, as always. However, when you’re done creating your email and hit “Next,” you’ll be presented with a new screen asking for alternate test email information.
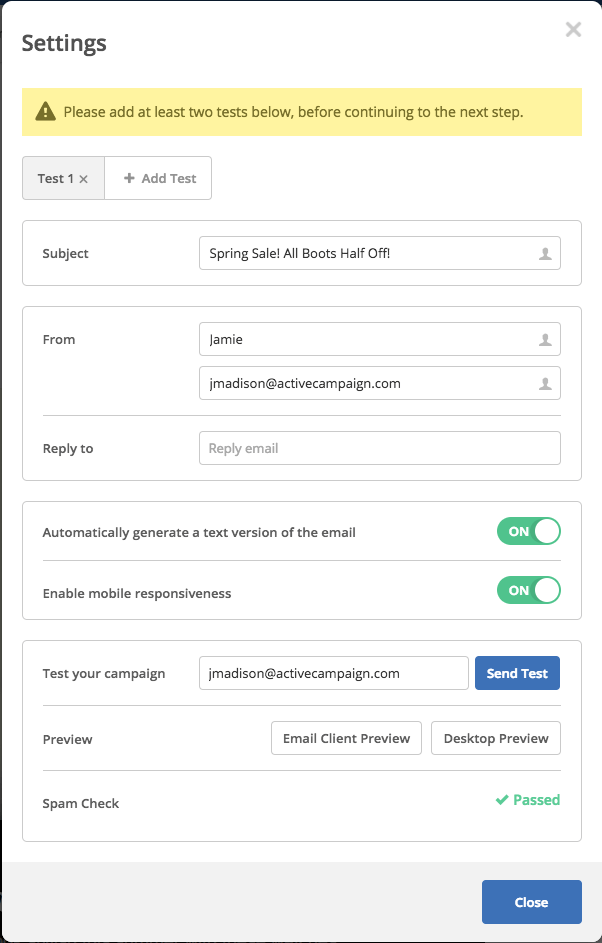
The top of the Settings box has “Test 1” and “+ Add Test.” When you click on “+ Add Test” you will have the opportunity to change the subject line and/or sender information.
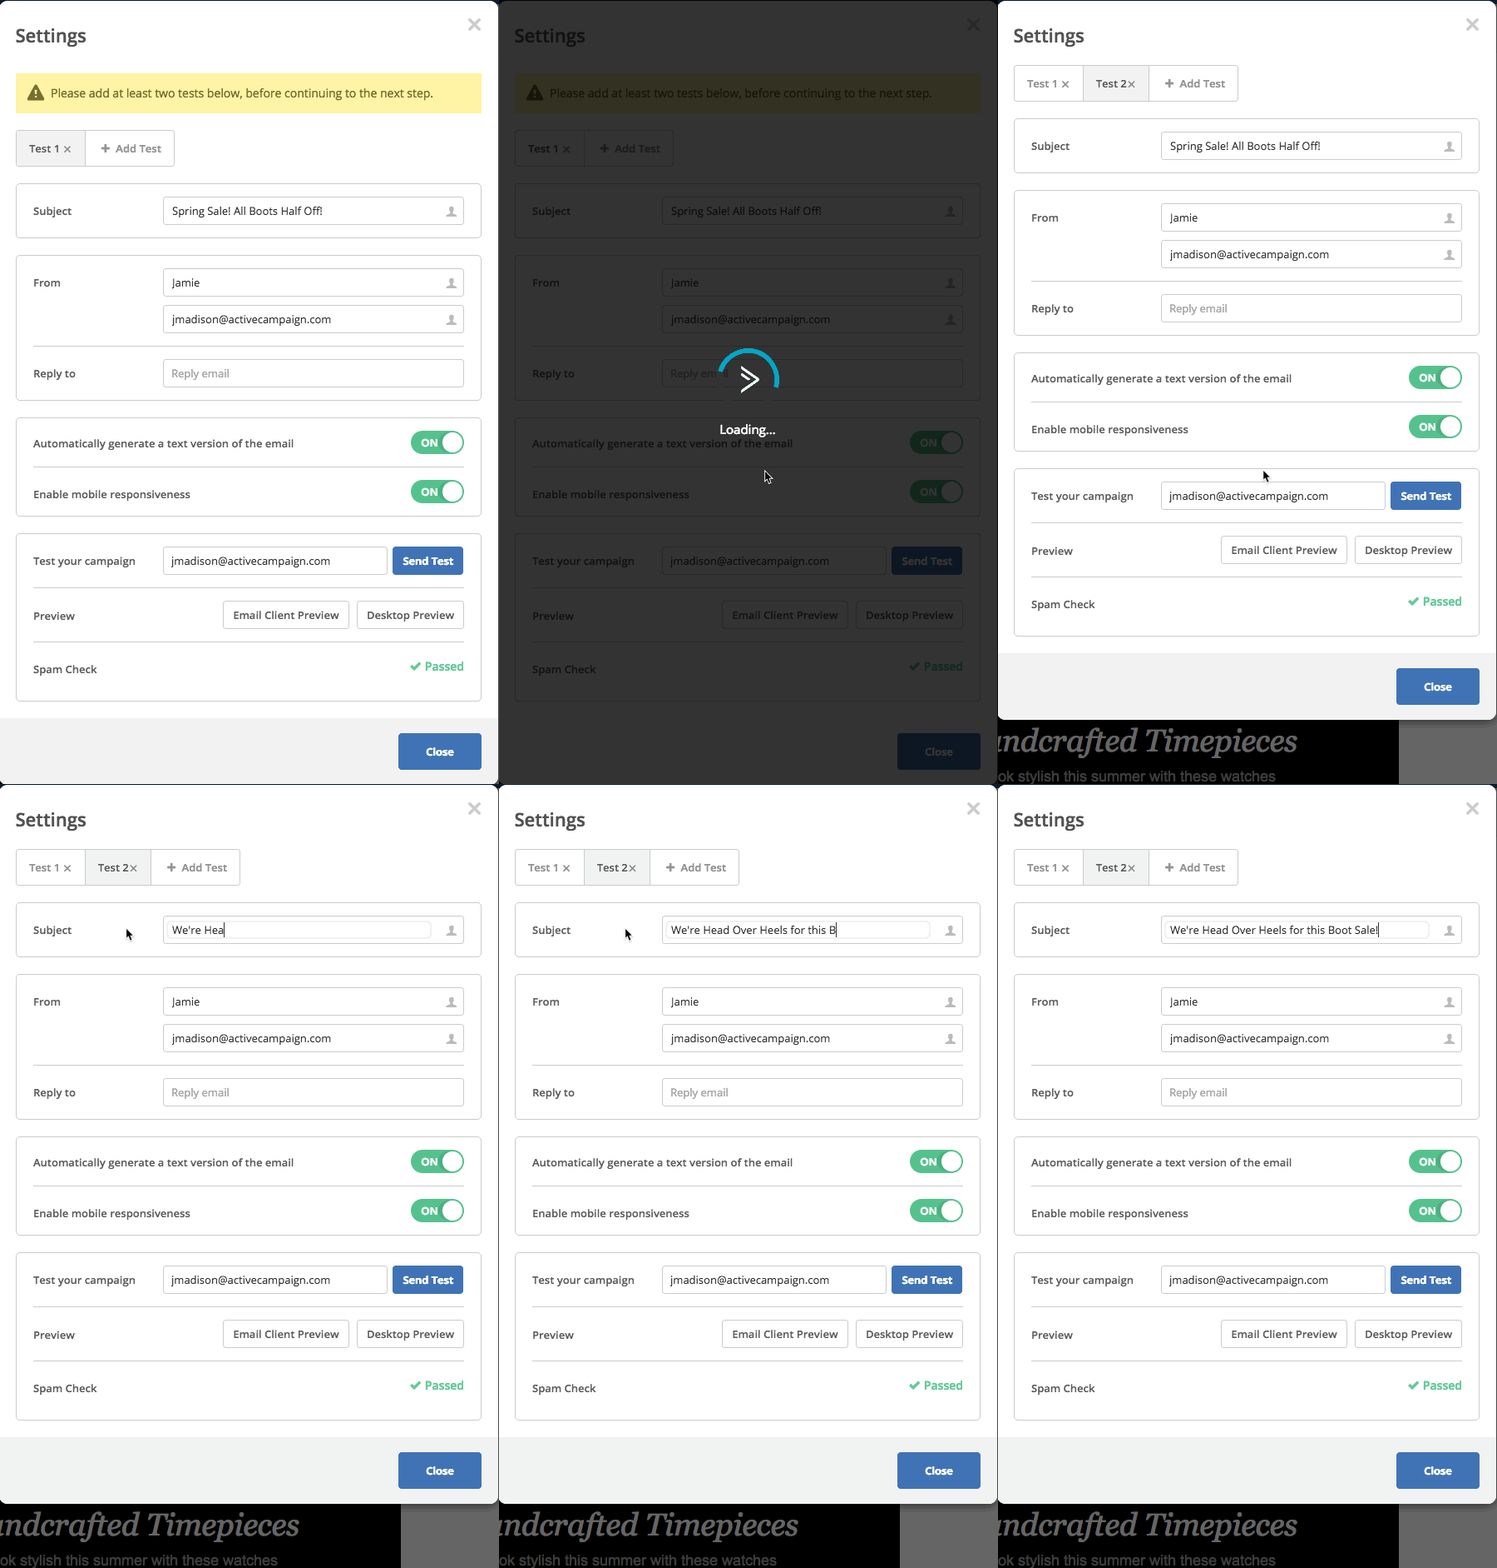
When you’ve created your variations and hit “Next,” you’ll see a summary of both emails. In this case, we see two different email subject lines.
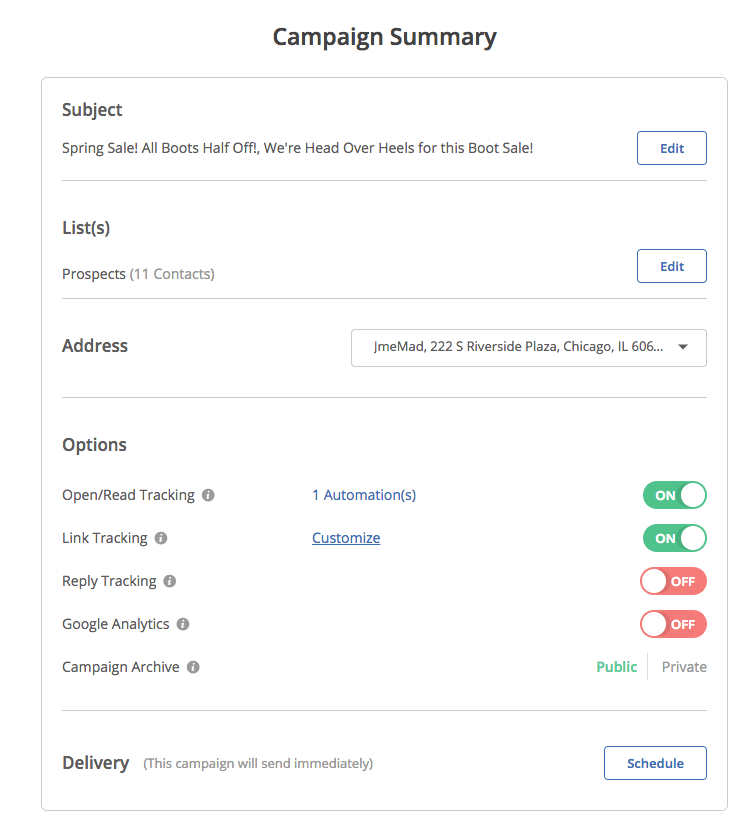
You’ll also see you have some additional options for test emails. You can send a test of either Split Test email, and both emails will go through a spam check. (The spam check is applicable when changing your sender email address.)
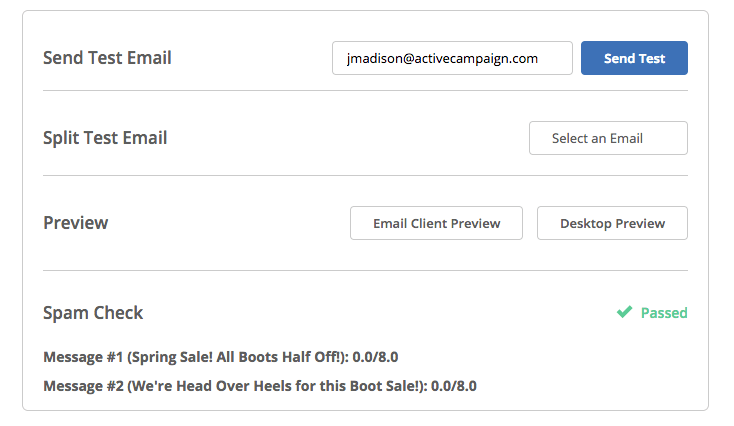
Finally, you also have Split Test Options on the bottom of the Summary screen. Here you can determine a Test Winner, and the ratio of emails that go out. Your first choice is important:
- Do not determine the winner
- Determine (and send using) the winner
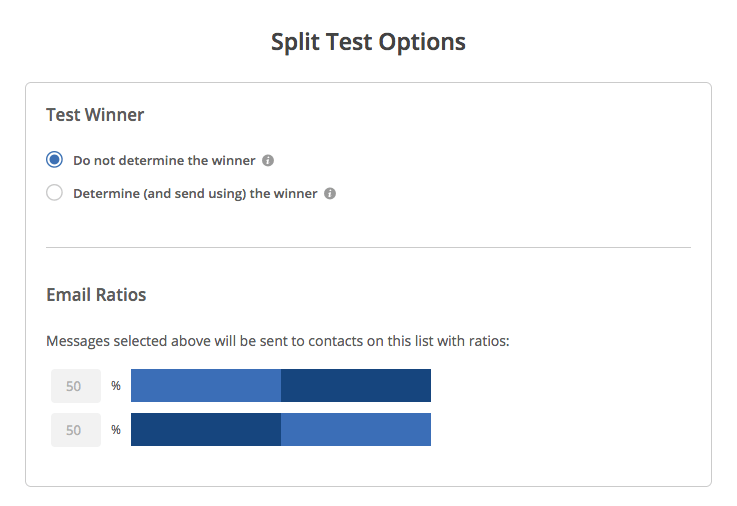
If you want to just send all of your campaign out at the same time, and see what happens at the end, you can select the first option. You will still be able to see what email performed the best, but it will not alter this campaign send.
However, if you select the second option to determine a winner, you will send a few emails to a smaller group, and then send the rest of your contacts the more successful version.
When you select the second option, an additional prompt will ask “How should the winning message be determined?” You have the choices of:
- “Best Click Rate” – Message where the most contacts click on a link in your message
- “Best Open Rate” – Message with the best open/read rate
Because we are testing the subject line, we’ll pick “Best Open Rate.” Now, we select how long the test should last, and what percentage of contacts will get the two versions of the test email.
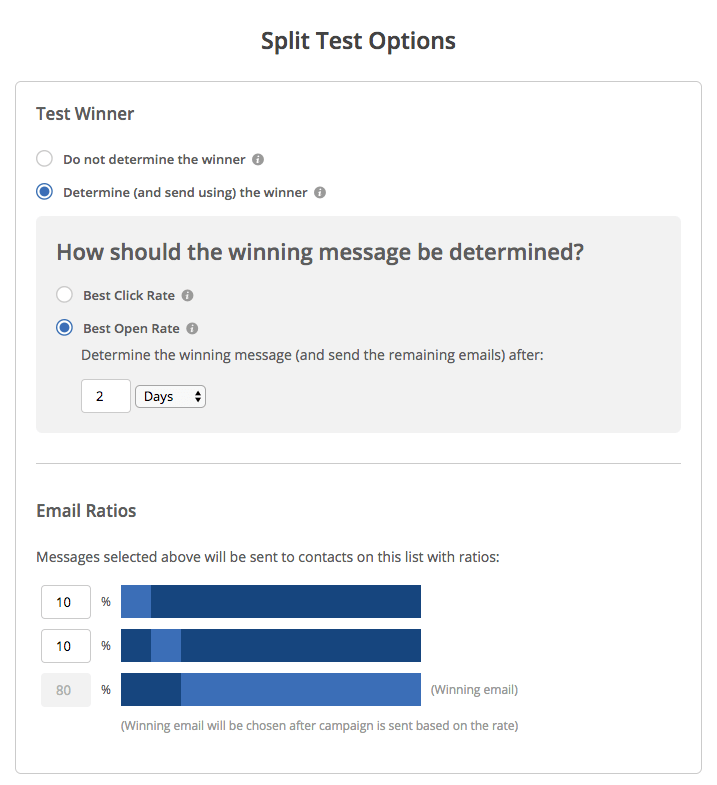
The two versions of the test email will be sent to a total of 20% of all contacts, with an even split between the group. After 2 days, the winner will be determined, and the final 80% of remaining contacts will be sent the more successful email: the email with the subject line that inspired more opens.
RSS Triggered Campaign
RSS Triggered campaigns “send whenever your RSS based feed is updated.” This is a great way to automatically deliver new content to your subscriber base. Our recent Help Center piece on RSS Triggered Campaigns is an in-depth overview of how and why to use this powerful campaign type.
Some powerful use cases include:
- Bloggers who want an email to automatically go out when new posts are published
- Non-profit that wants to send an email every time a new event is posted to their site
When you begin an RSS Triggered Campaign, you select your list and segment as desired, just like other campaigns. When editing the template, you can drop an RSS Feed block into the email in order to automatically update your content, based on a specific URL.
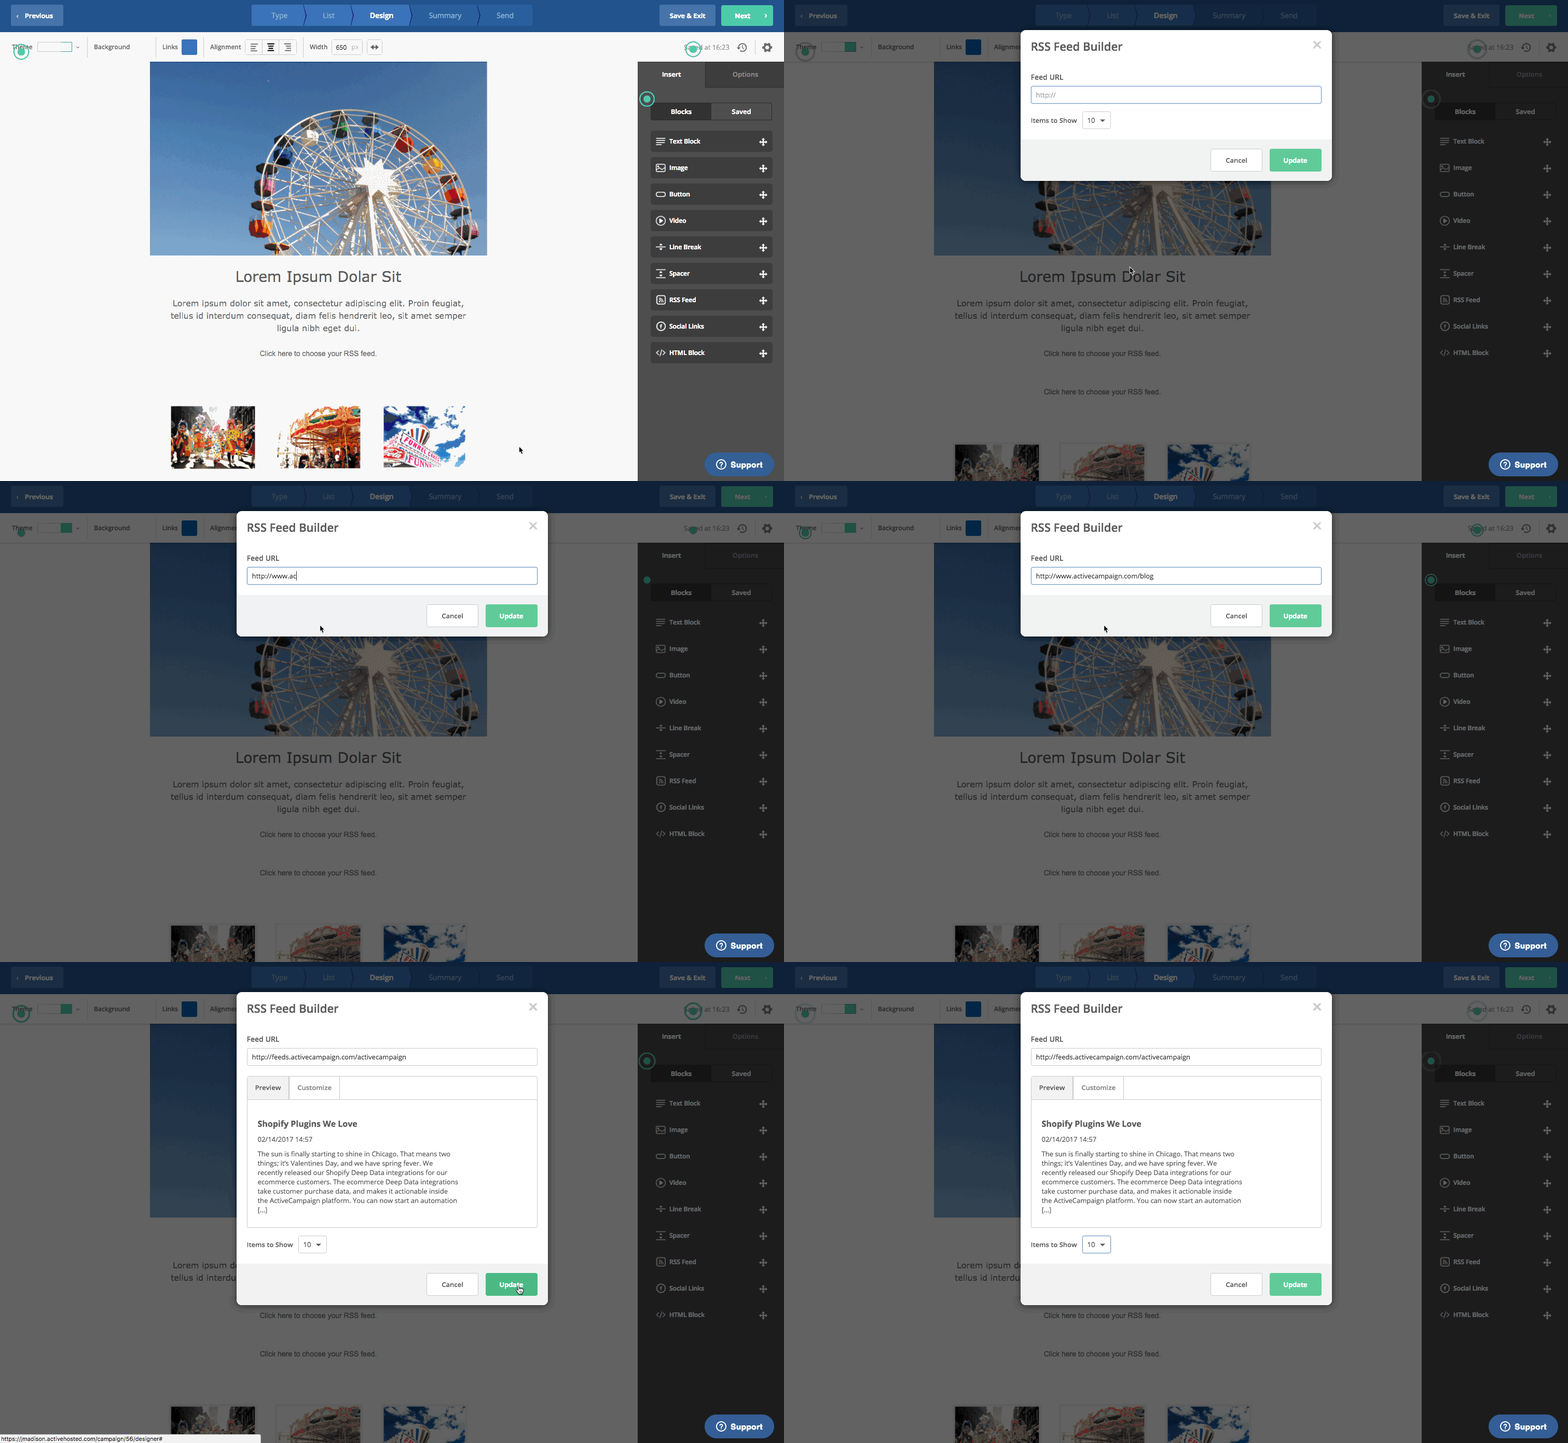
As seen in the video above, your blog will pull into the RSS Feed Builder, allowing you to customize your information. (Check out our Help Center article for in-depth customization information.)
At the Campaign Summary page, you’ll notice an important difference: you can schedule how frequently the campaign checks for “New Posts.”
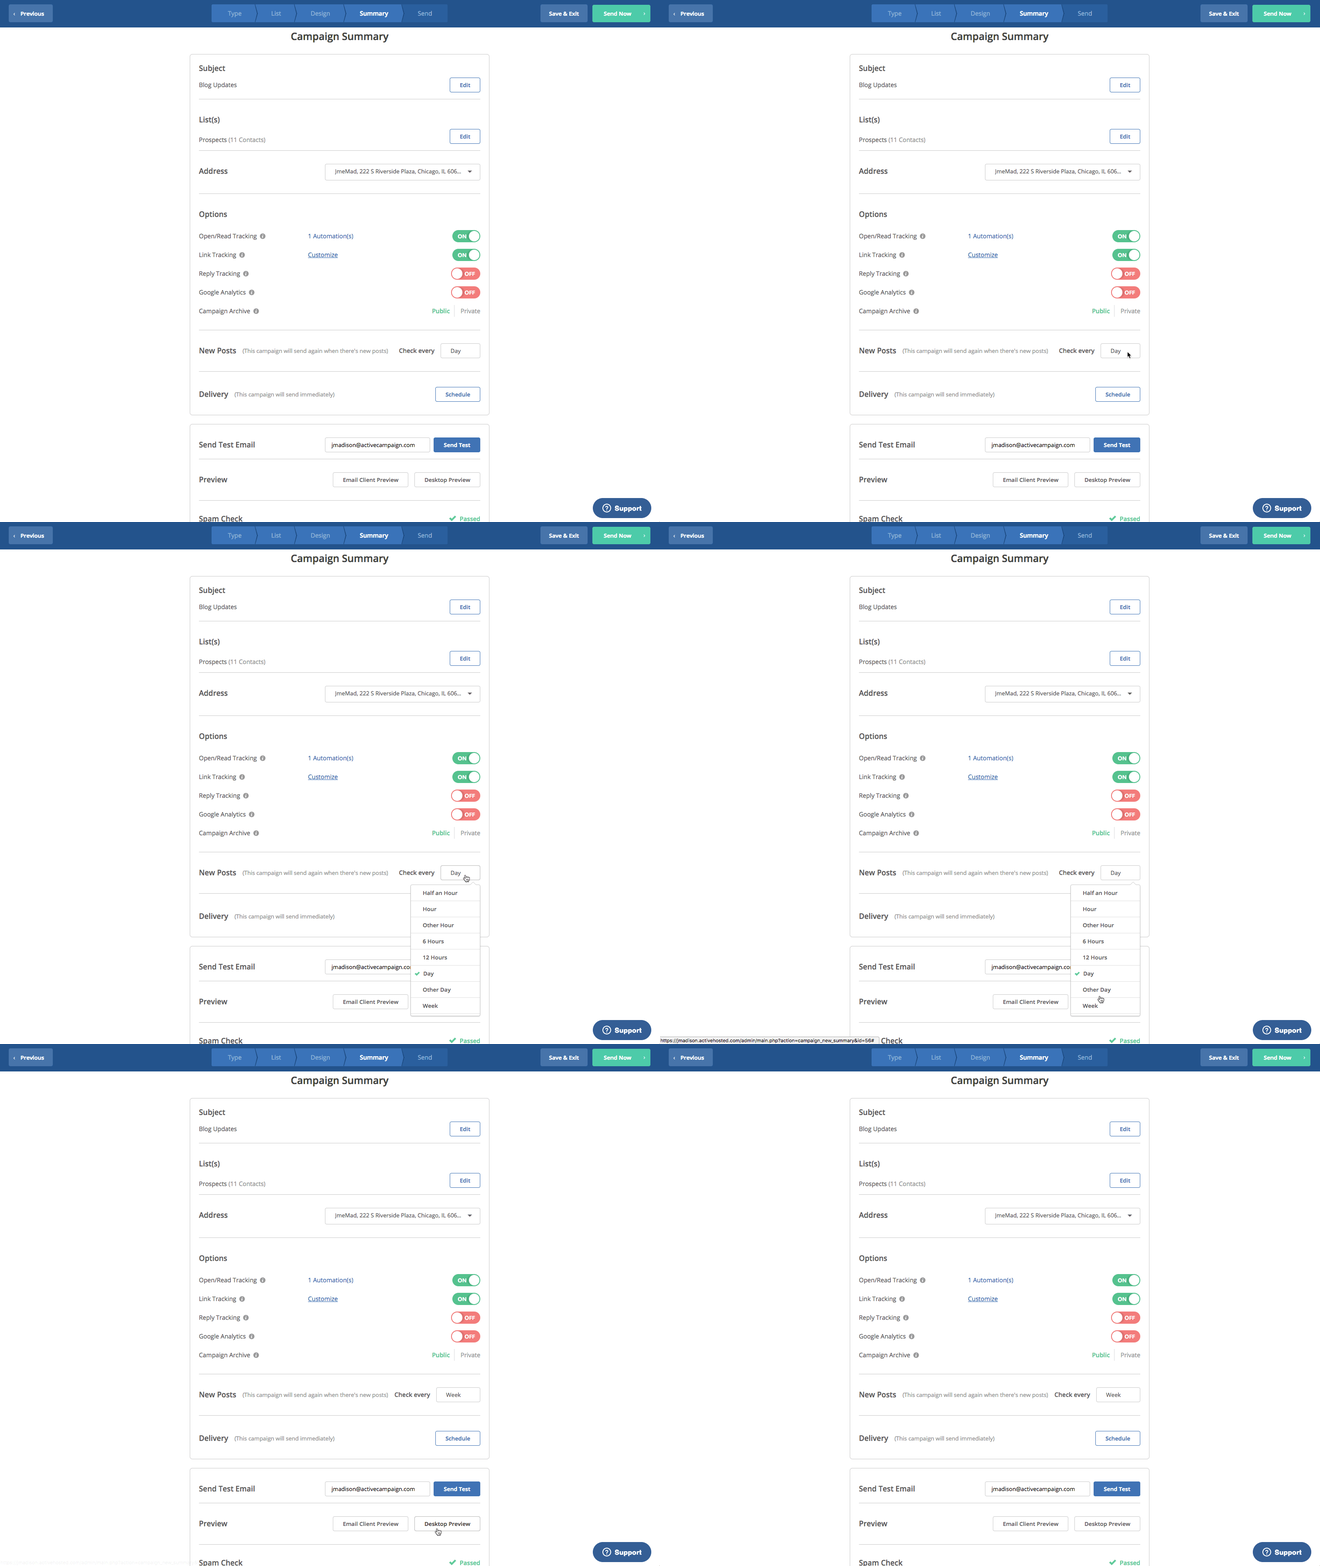
Now our RSS Triggered email campaign will send new content to our contacts, checking every week for new updates.
Date Based Campaign
The Date Based Campaign is a simple way to “send on contact birthdays, anniversaries and more.” Date Based marketing can be particularly effective, sharing content personalized for an important day. As with other campaigns, you begin by selecting your list and any applicable segments.
In our example, we’ll send contacts a coupon on their birthday. Potential contacts are invited to share their email and birthday address for a special coupon. When people complete this form, they will have the tag “Birthday” added to their contact record.
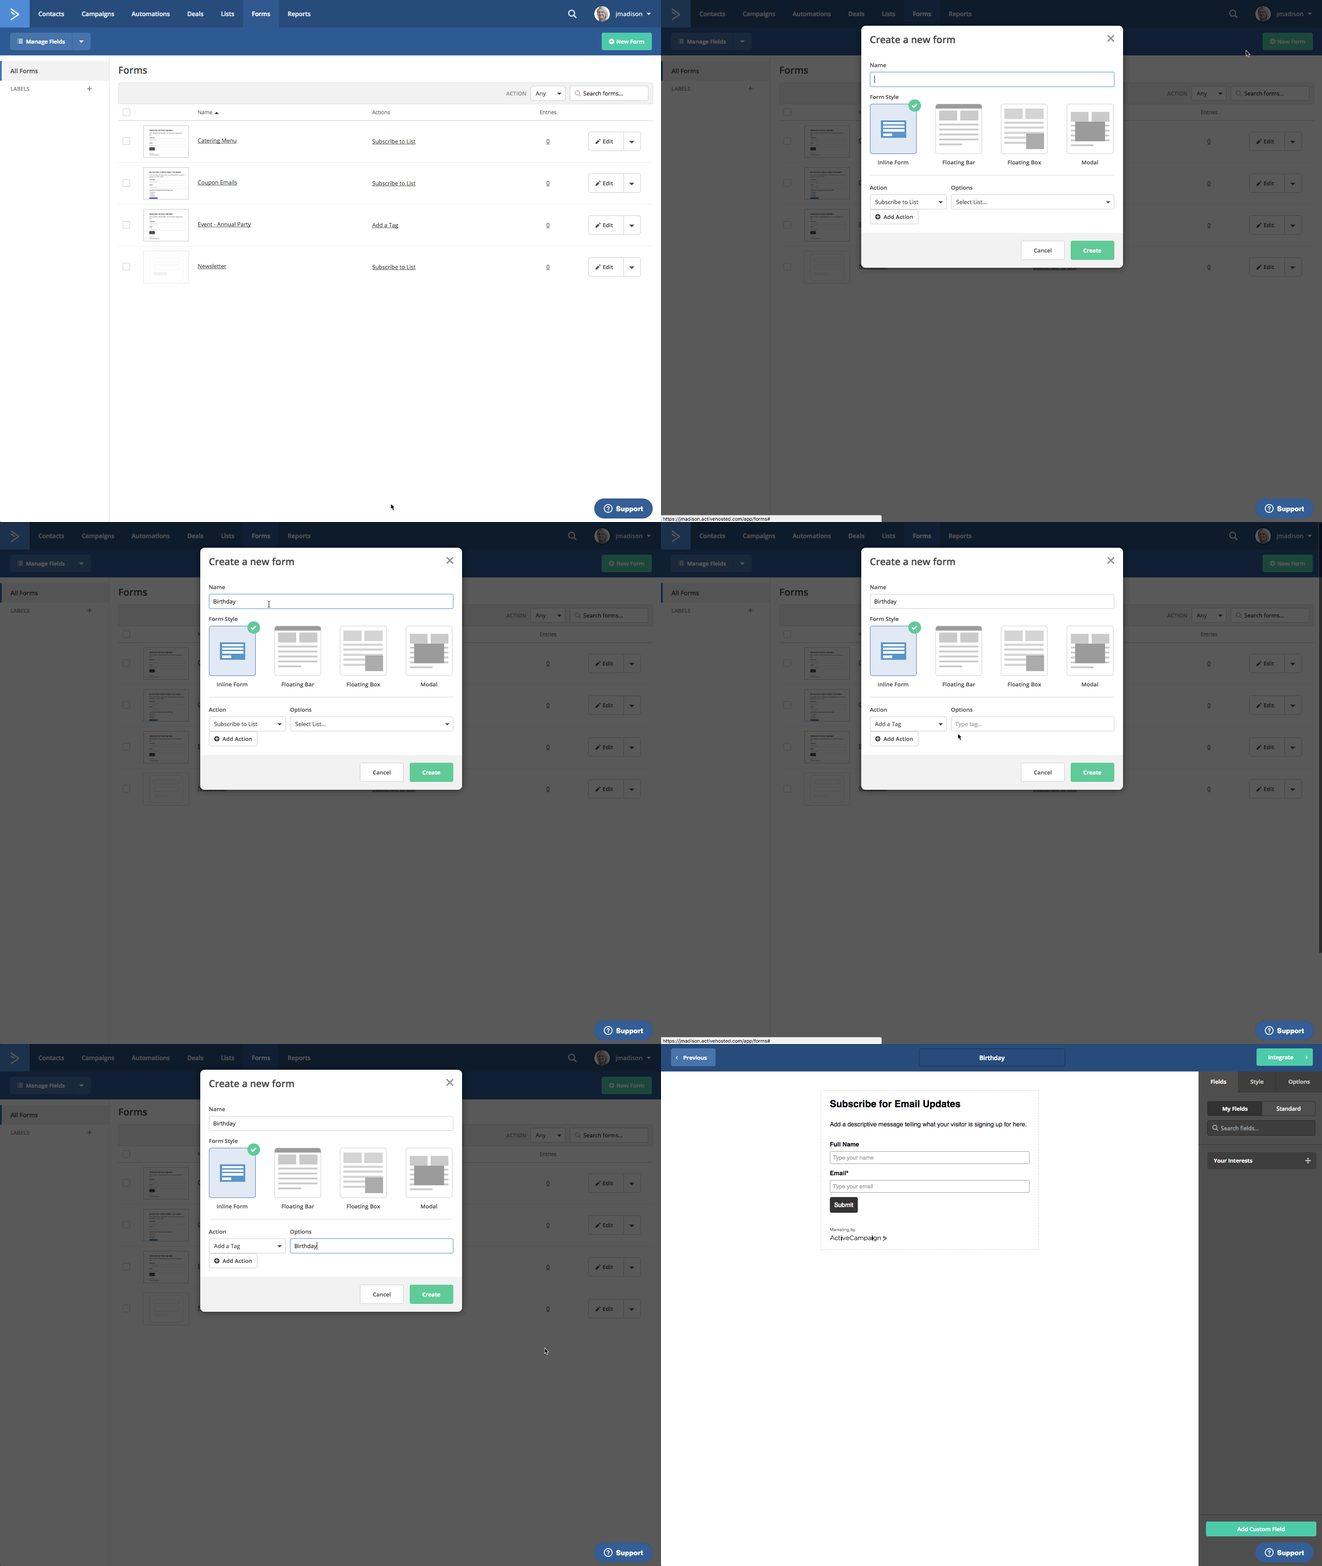
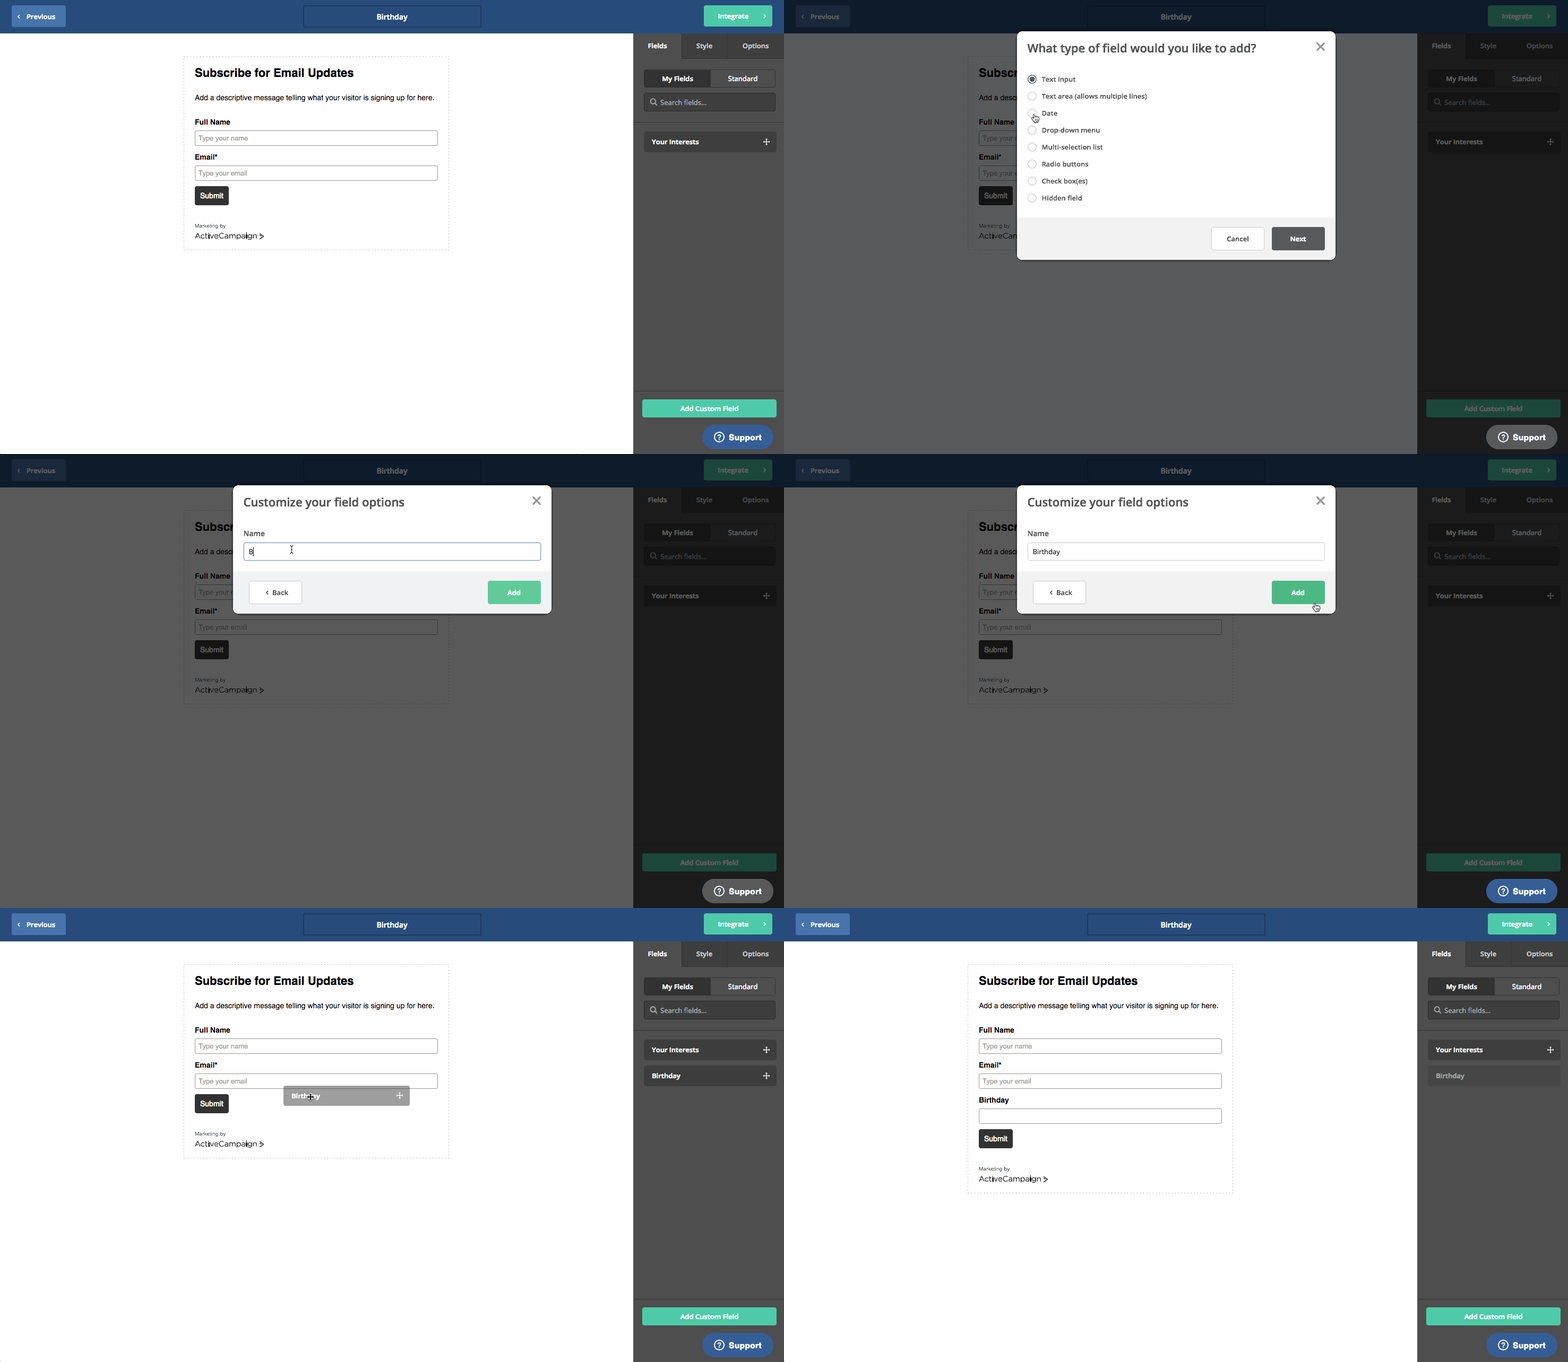
Next, you can create a custom date field for a contact’s birthday to leverage this type of campaign.
After creating a birthday email template, the Campaign Summary screen will allow us to select what date triggers the campaign send. We’ll change the Delivery to the new Birthday Custom Field.
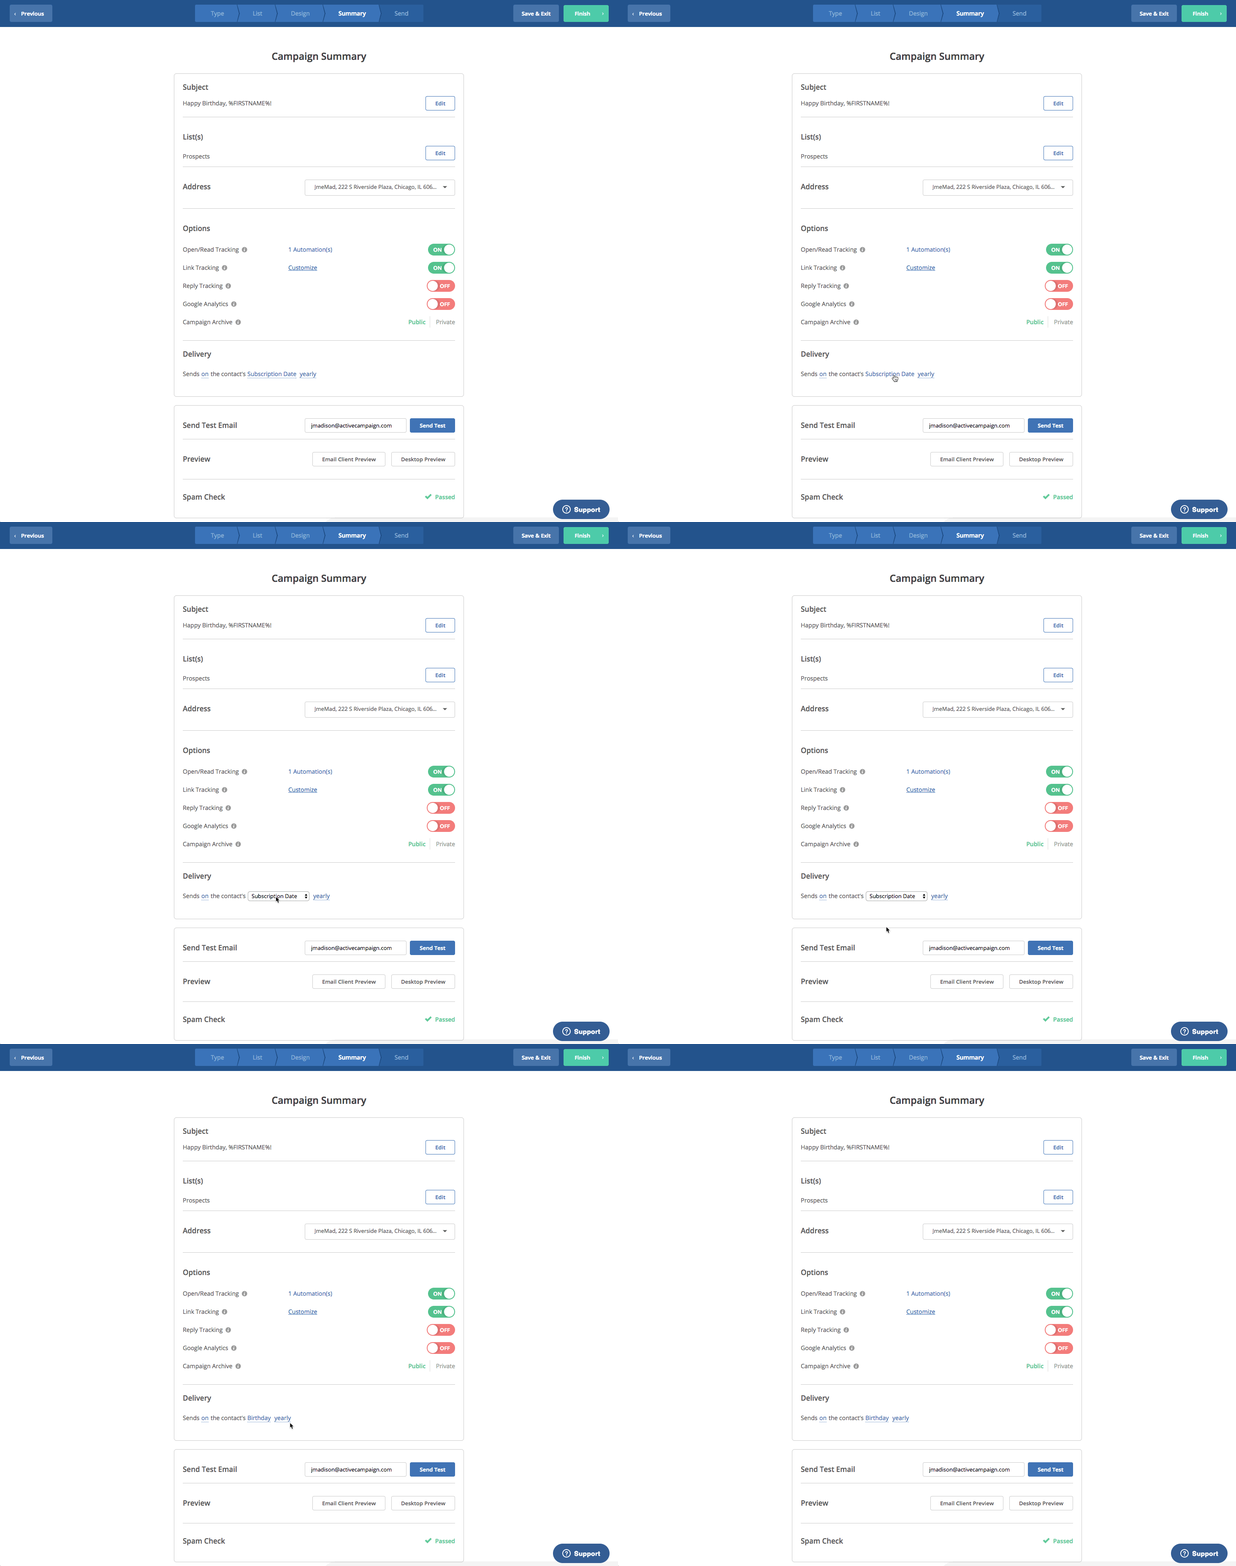
Now our contacts will automatically be sent a coupon on their birthday, based on their Birthday field.
Summary
ActiveCampaign has created several Campaign types to simplify your marketing automation. Using Standard, Automated, Auto Responder, Split Testing, RSS Triggered, and Date Based campaigns offer a variety of specialized options. What types of campaigns do you use the most? Let us know in the comments below.
